25 Schaltpläne von alter DDR-Technik, Weichen, Signale usw. (Bild anklicken für mehr)
12 Bilder zu:
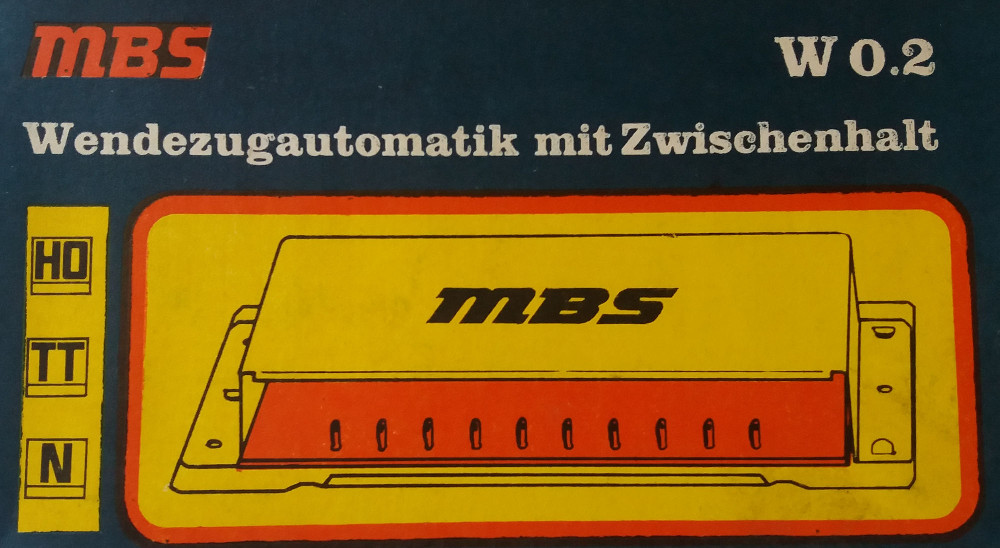
Bild 1 von 12 - MBS Wendezugautomatik W 0.2 incl. Beschreibung
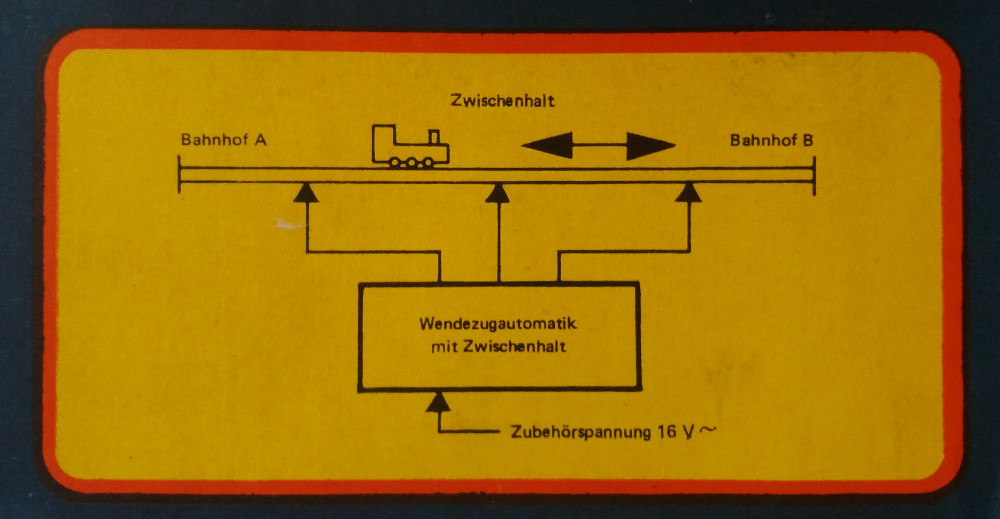 Bild 2 von 12 - MBS Wendezugautomatik W 0.2 incl. Beschreibung
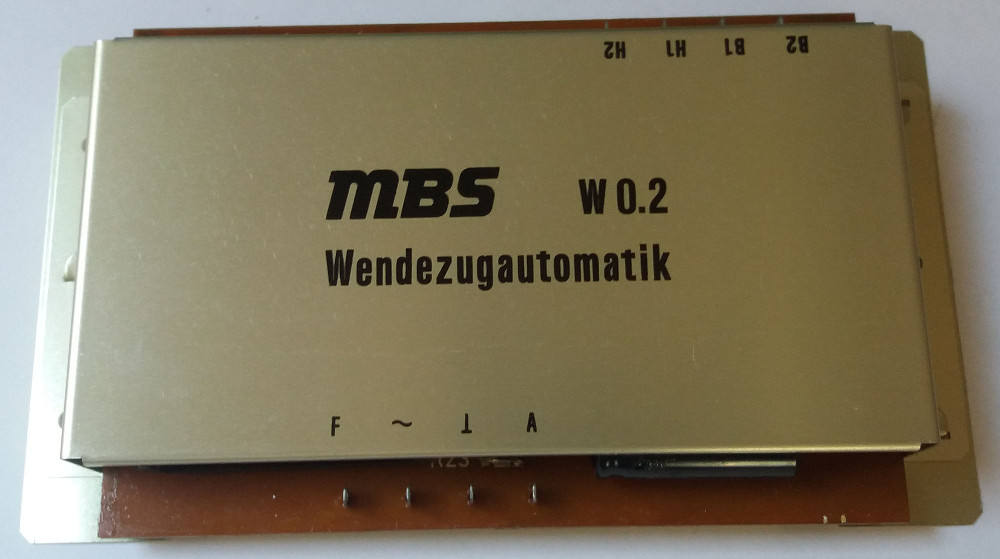 Bild 3 von 12 - MBS Wendezugautomatik W 0.2 incl. Beschreibung
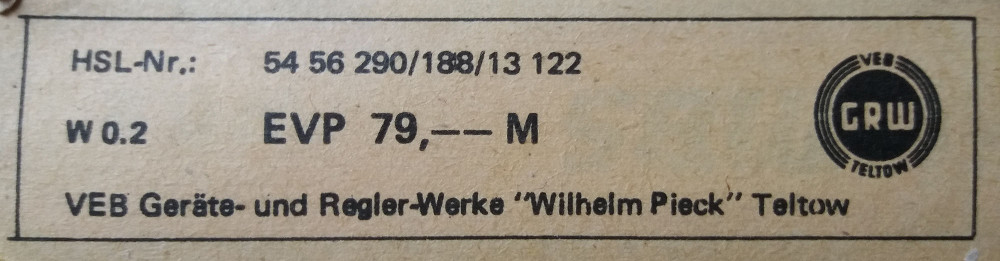 Bild 4 von 12 - MBS Wendezugautomatik W 0.2 incl. Beschreibung
 Bild 5 von 12 - MBS Wendezugautomatik W 0.2 incl. Beschreibung
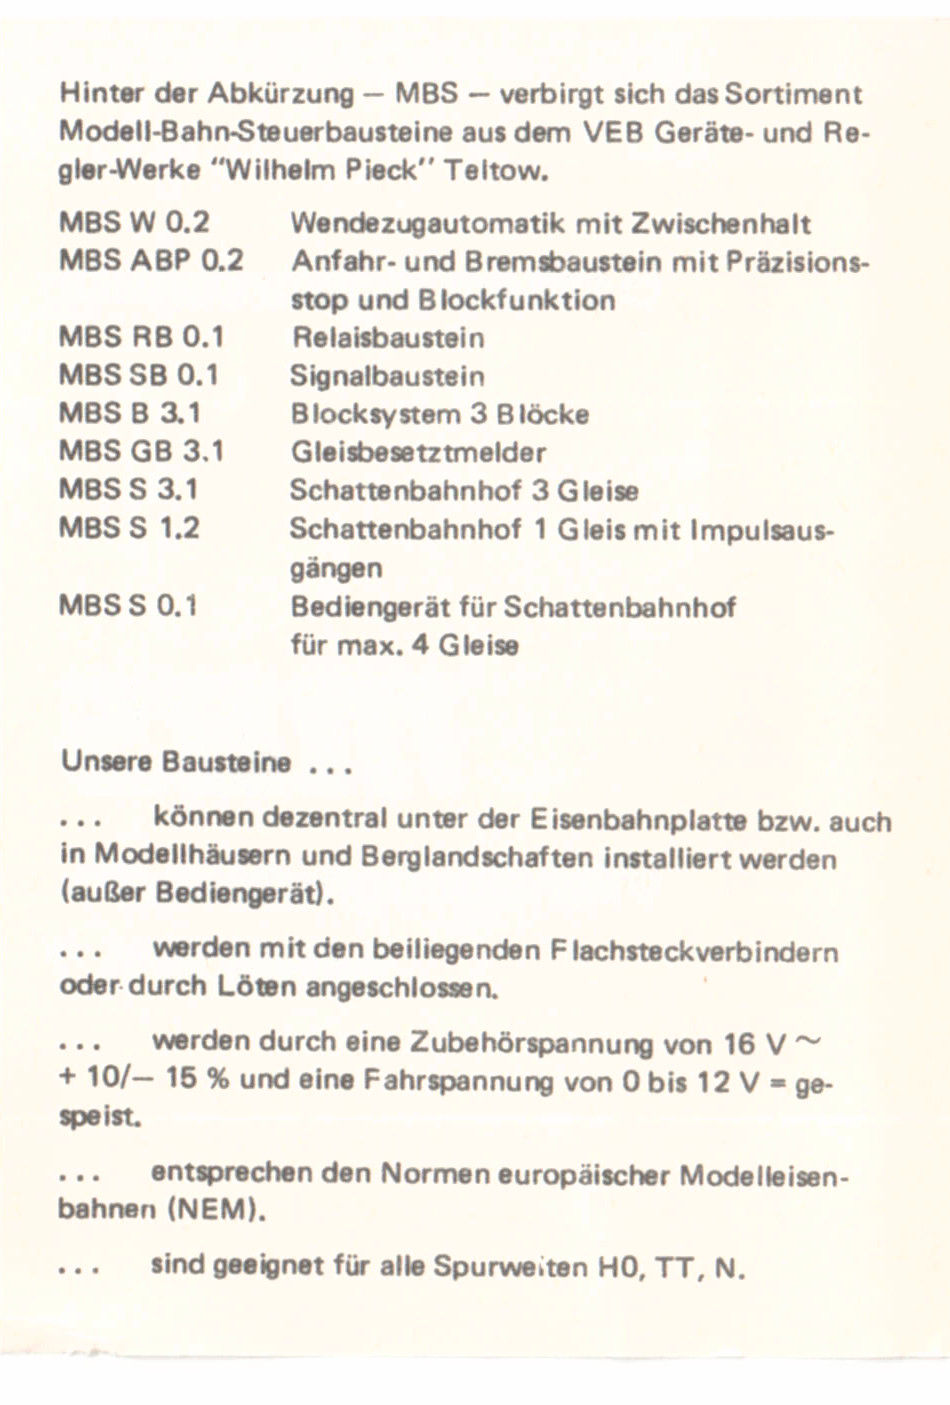 Bild 6 von 12 - MBS Wendezugautomatik W 0.2 incl. Beschreibung
 Bild 7 von 12 - MBS Wendezugautomatik W 0.2 incl. Beschreibung
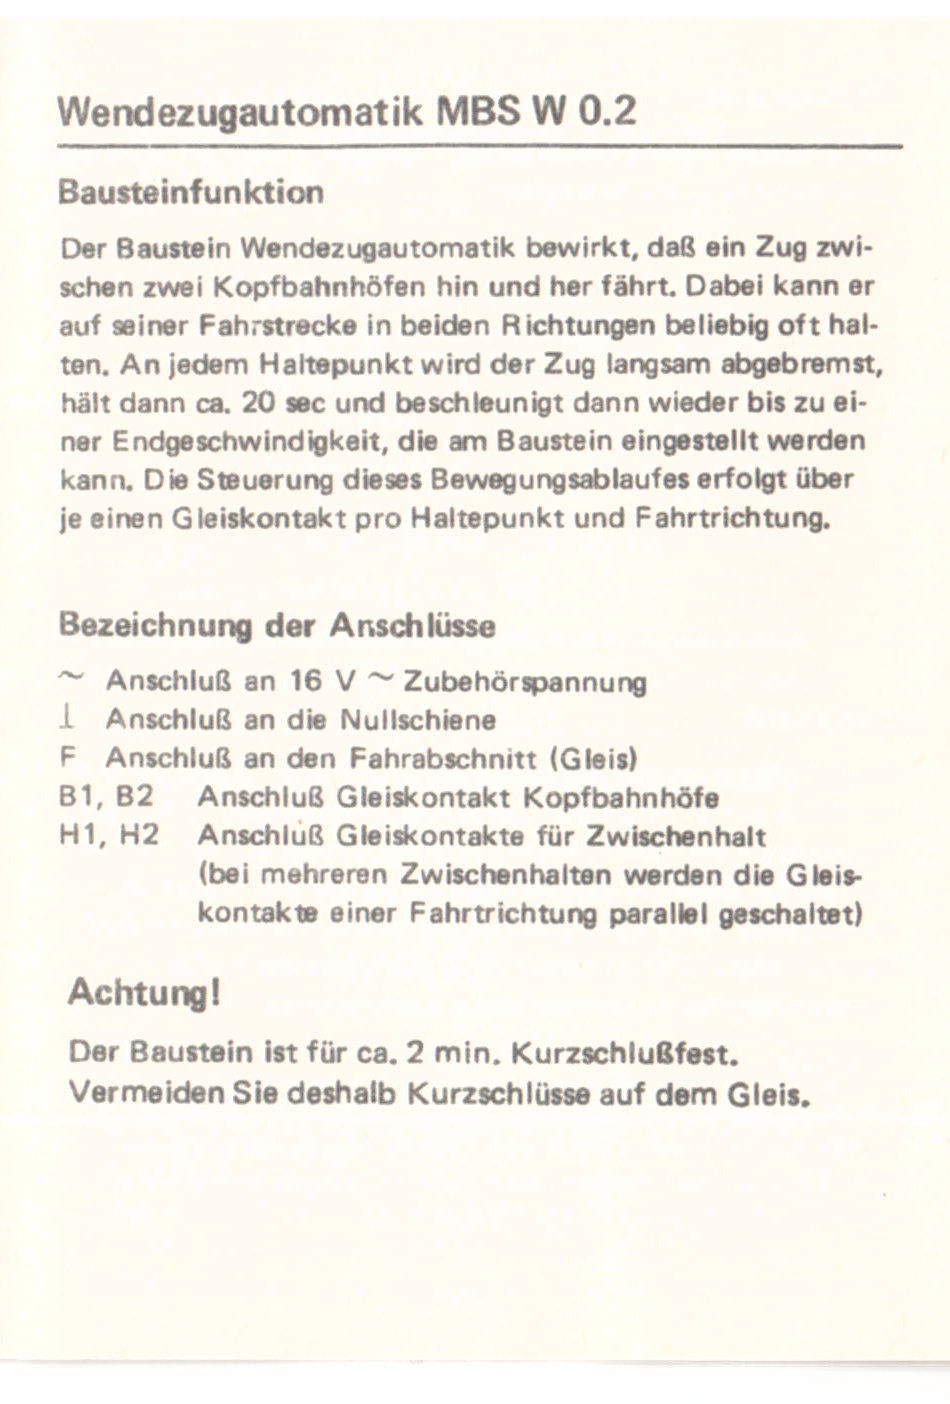 Bild 8 von 12 - MBS Wendezugautomatik W 0.2 incl. Beschreibung
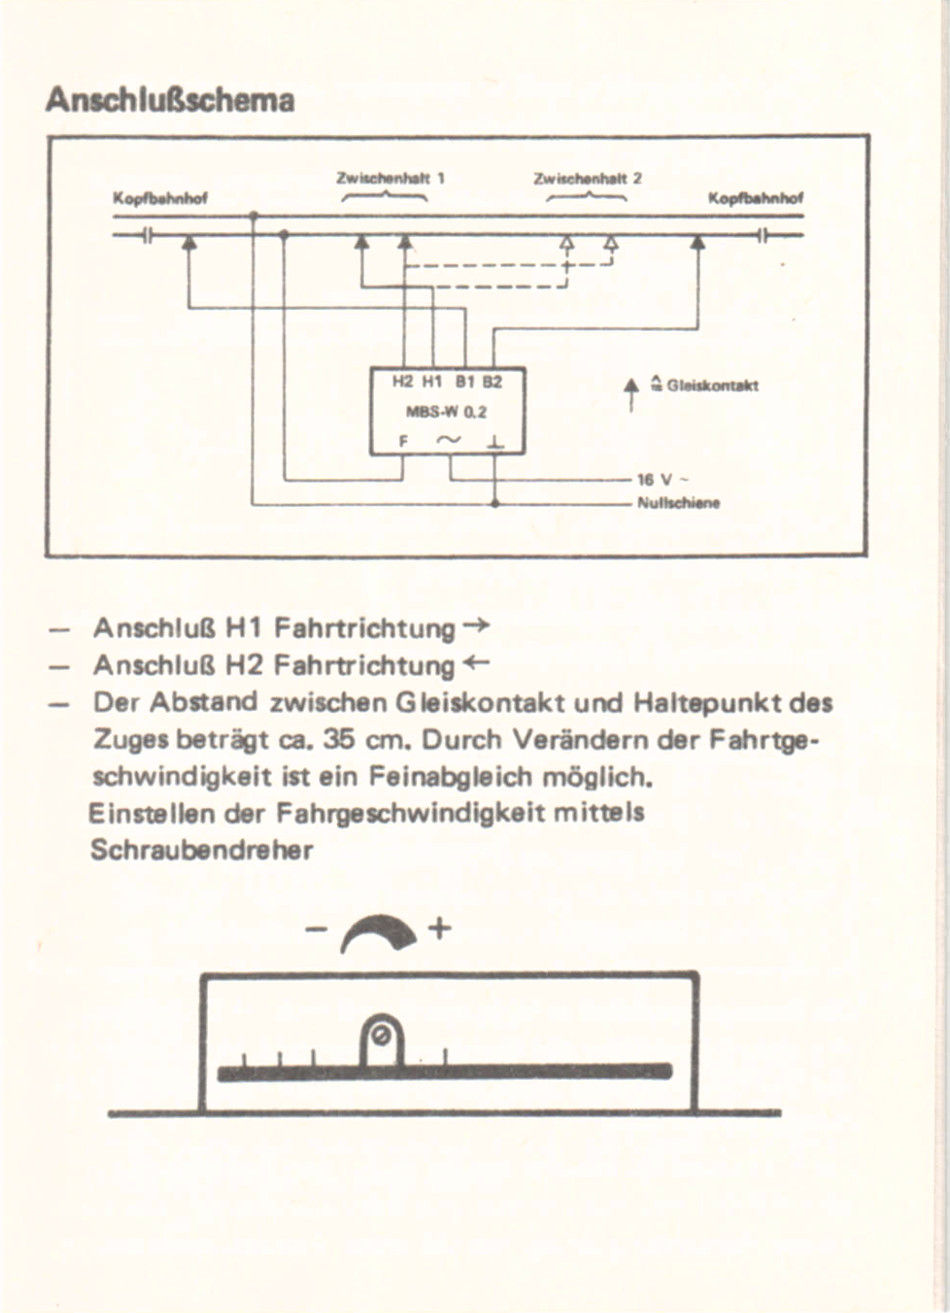 Bild 9 von 12 - MBS Wendezugautomatik W 0.2 incl. Beschreibung
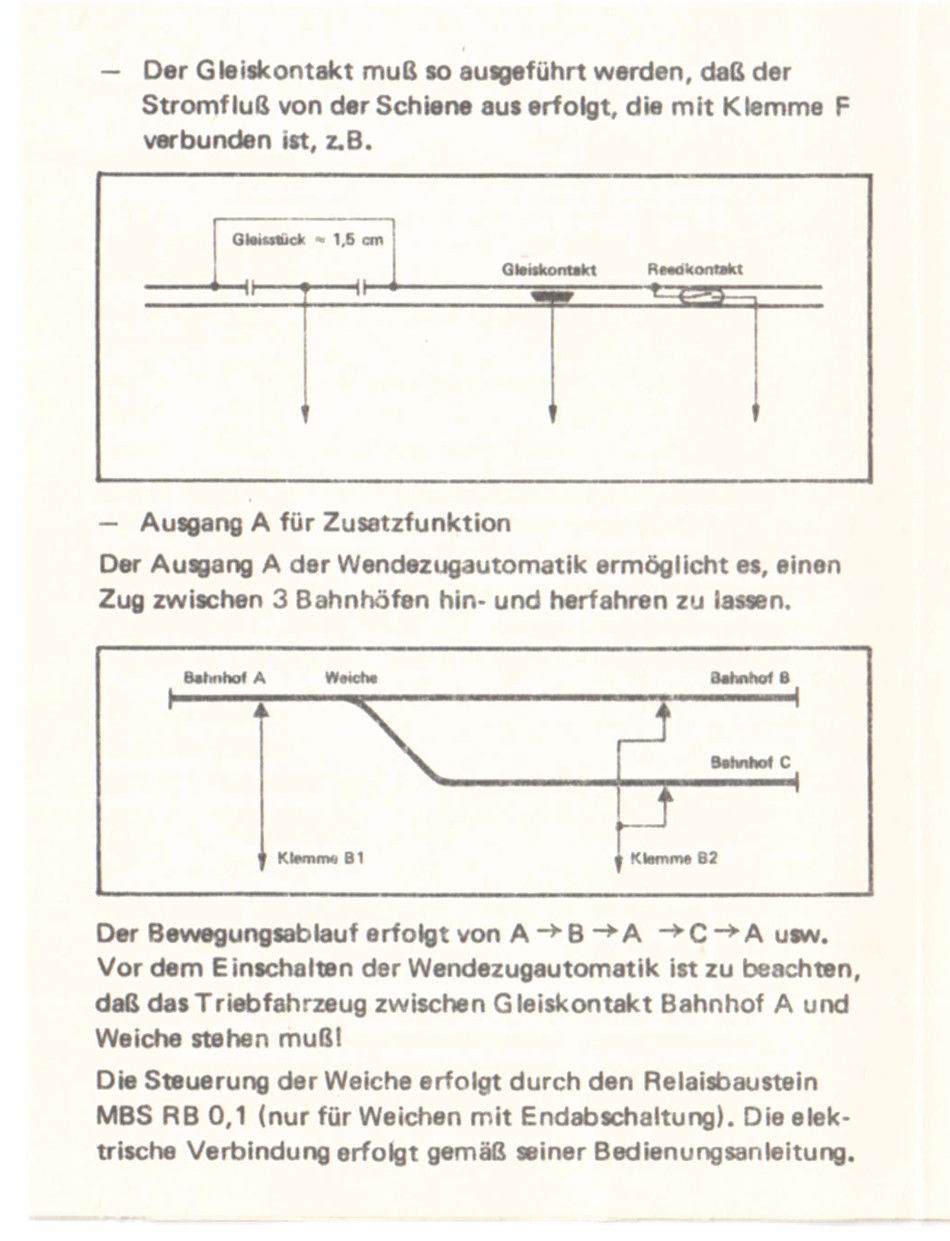 Bild 10 von 12 - MBS Wendezugautomatik W 0.2 incl. Beschreibung
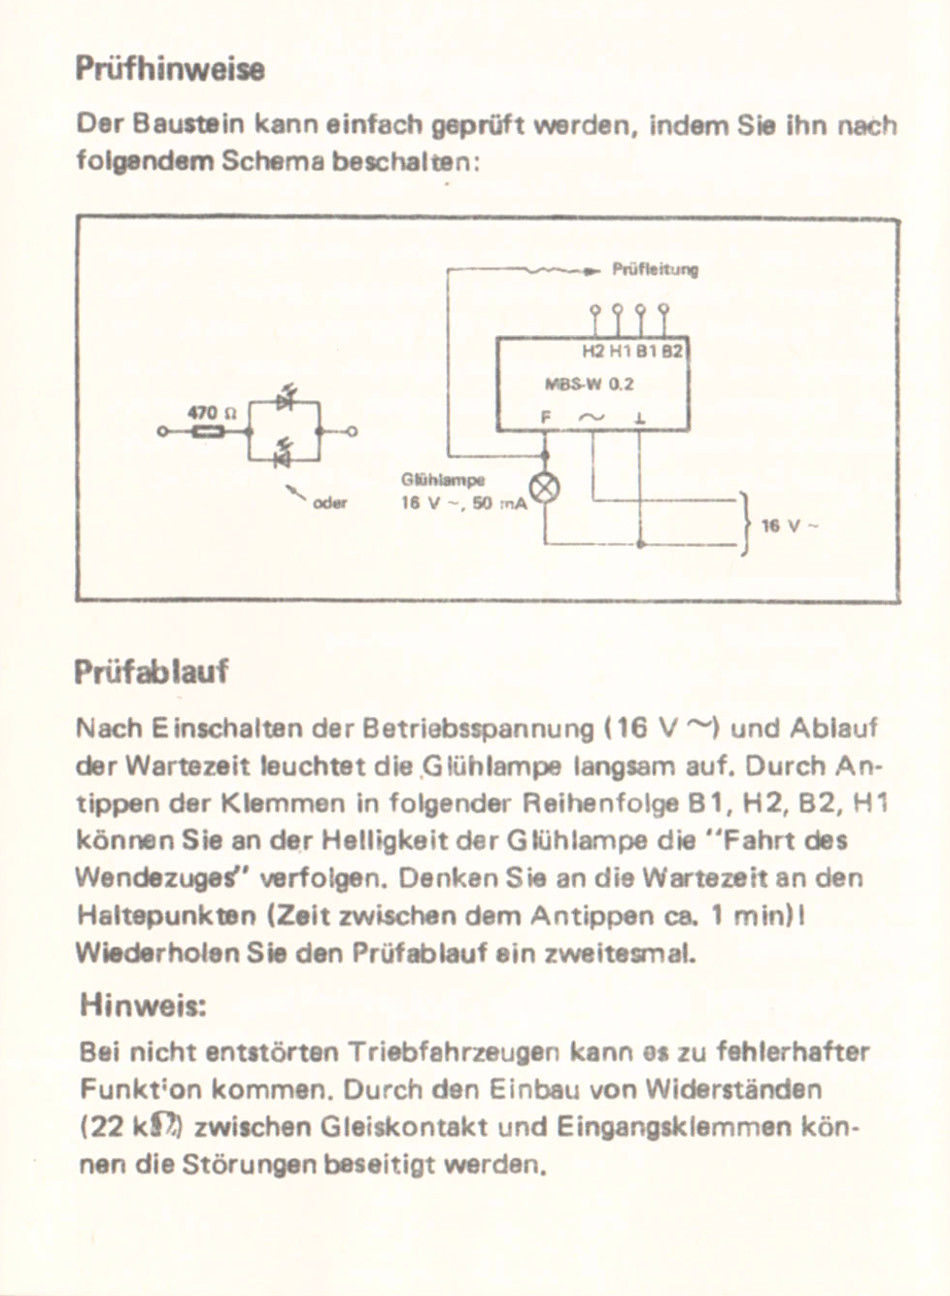 Bild 11 von 12 - MBS Wendezugautomatik W 0.2 incl. Beschreibung
 Bild 12 von 12 - MBS Wendezugautomatik W 0.2 incl. Beschreibung
MBS W 0.2 Wendezugautomatik
mit Zwischenhalt
incl. Bedienungsanleitung und Anschlussplan
10 Bilder zu:
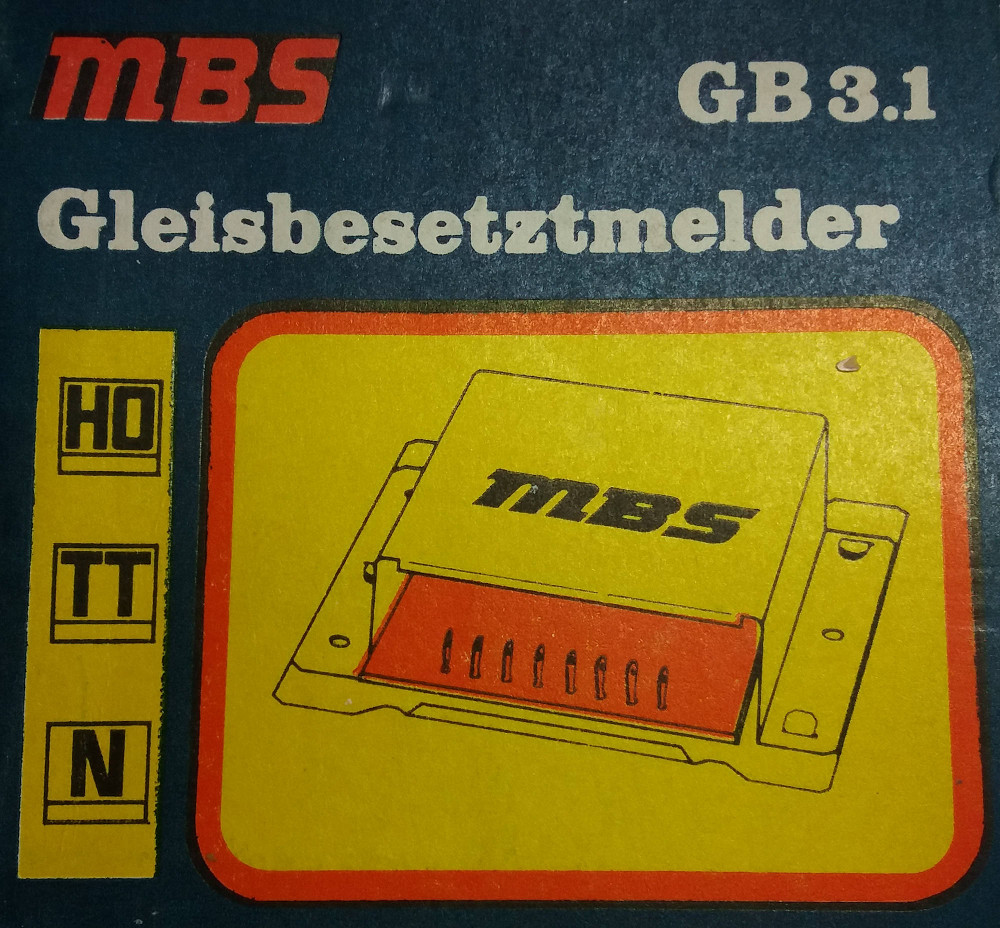
Bild 1 von 10 - MBS Gleisbesetztmelder GB 3.1 incl. Beschreibung
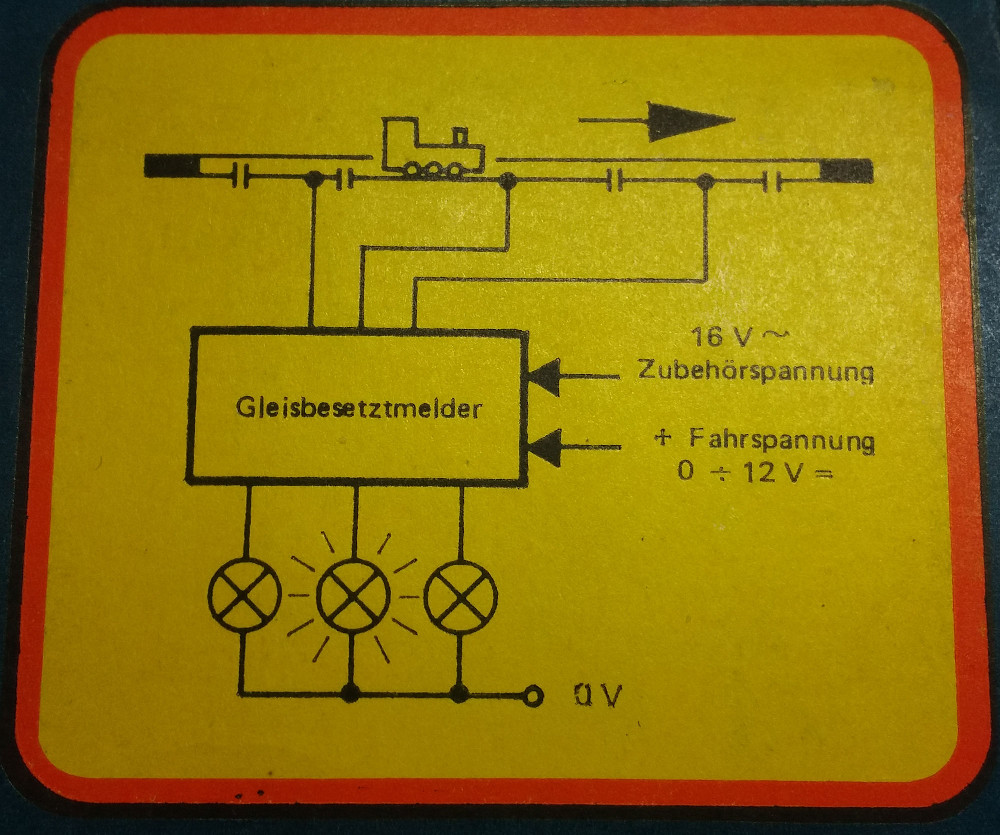 Bild 2 von 10 - MBS Gleisbesetztmelder GB 3.1 incl. Beschreibung
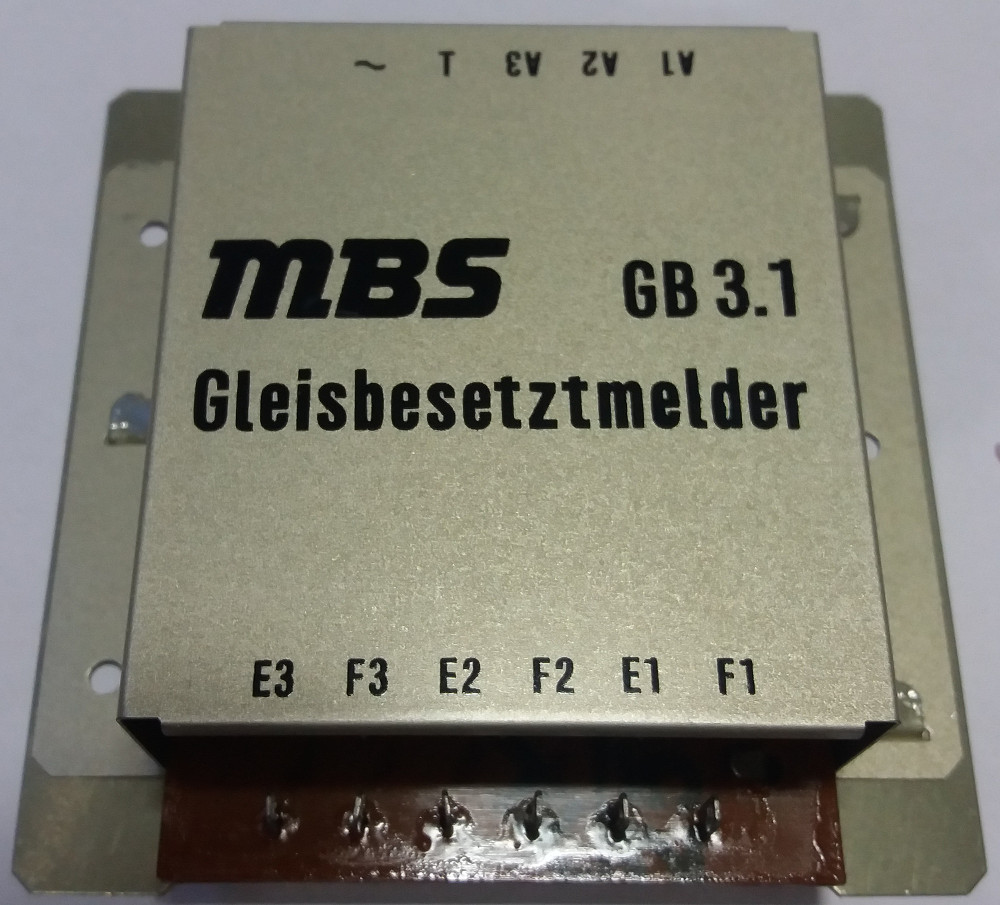 Bild 3 von 10 - MBS Gleisbesetztmelder GB 3.1 incl. Beschreibung
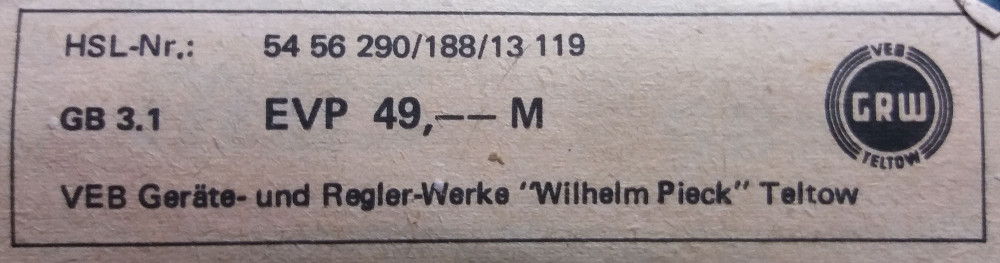 Bild 4 von 10 - MBS Gleisbesetztmelder GB 3.1 incl. Beschreibung
 Bild 5 von 10 - MBS Gleisbesetztmelder GB 3.1 incl. Beschreibung
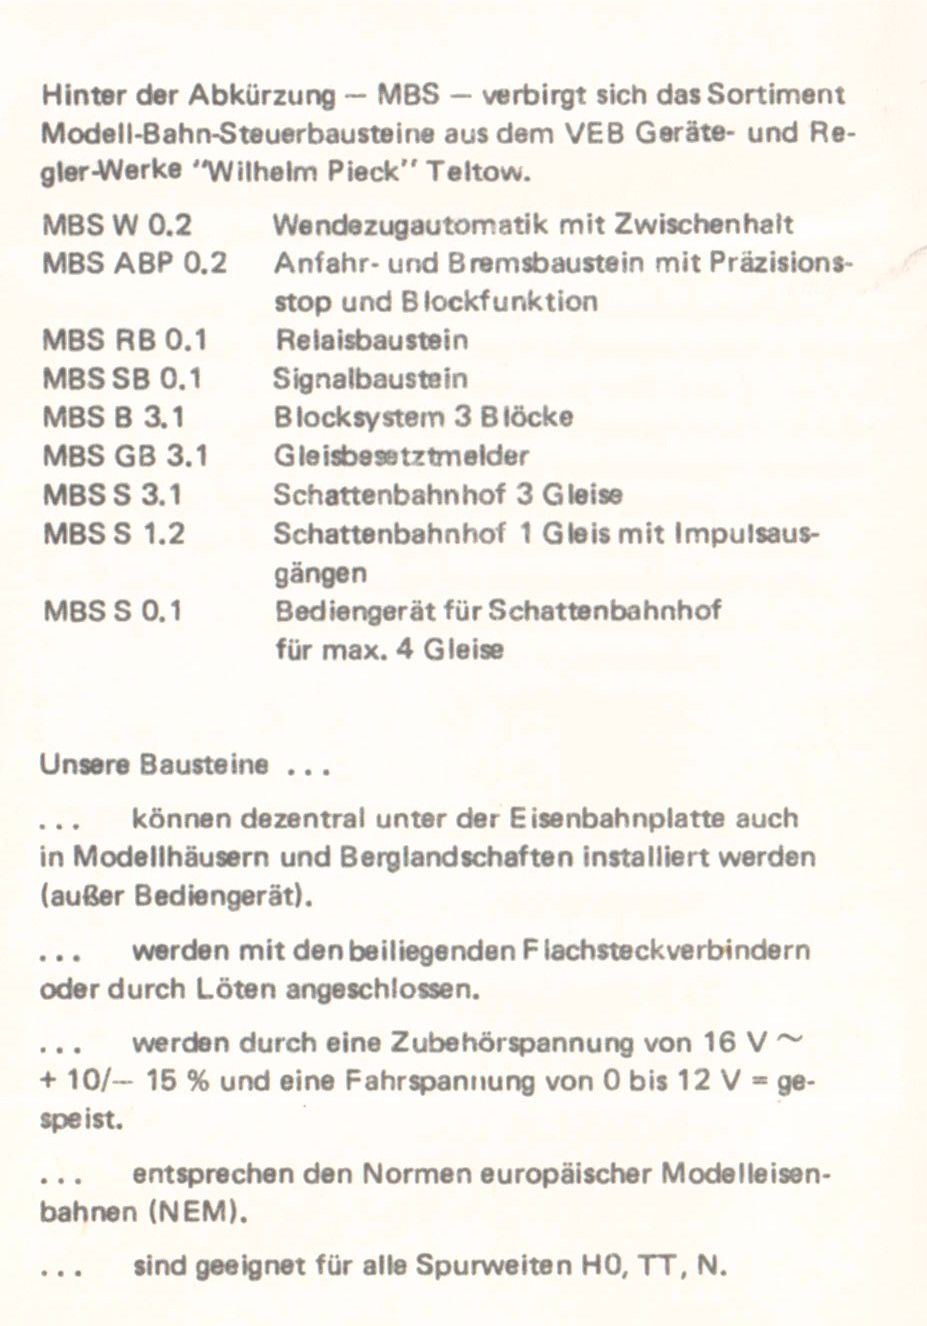 Bild 6 von 10 - MBS Gleisbesetztmelder GB 3.1 incl. Beschreibung
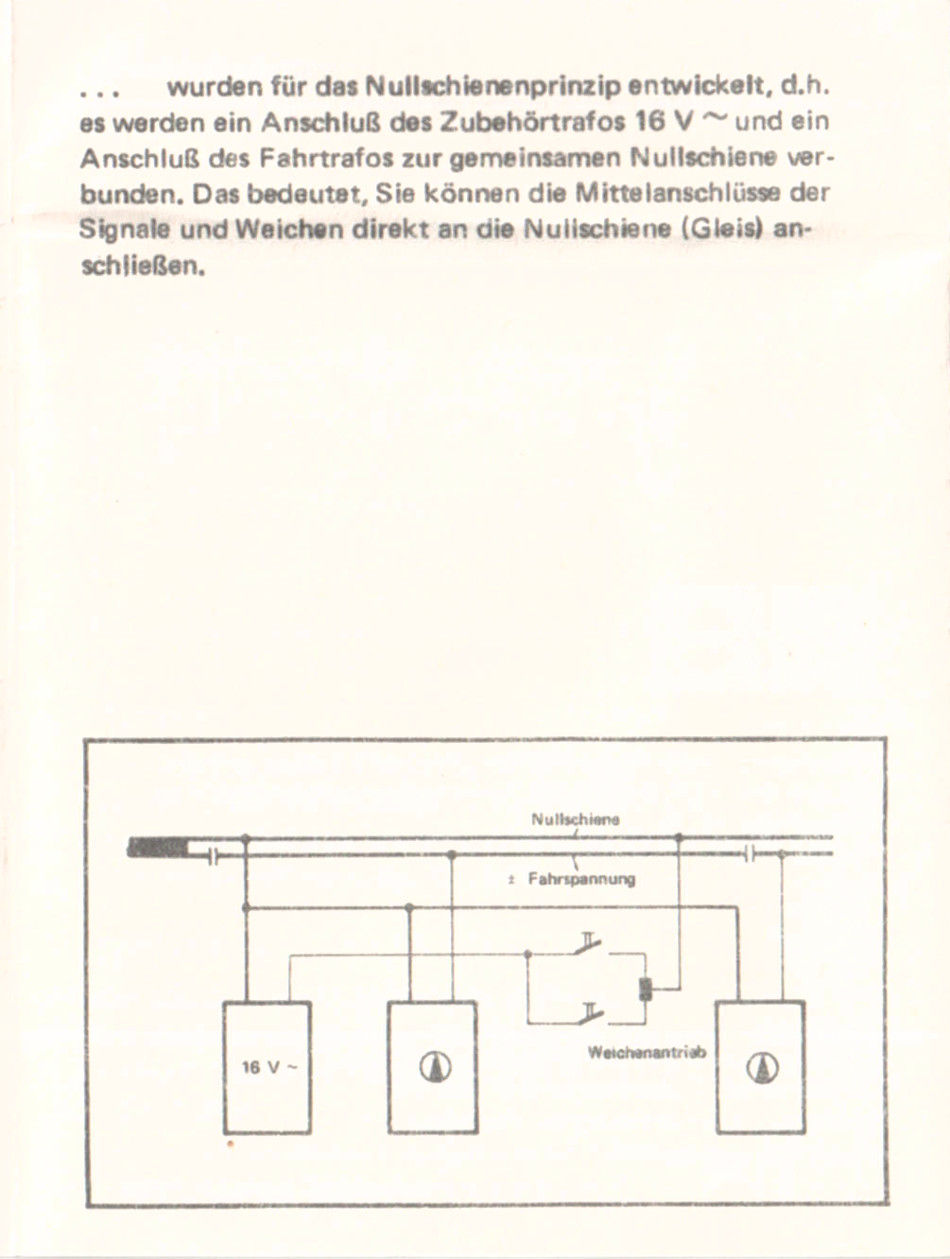 Bild 7 von 10 - MBS Gleisbesetztmelder GB 3.1 incl. Beschreibung
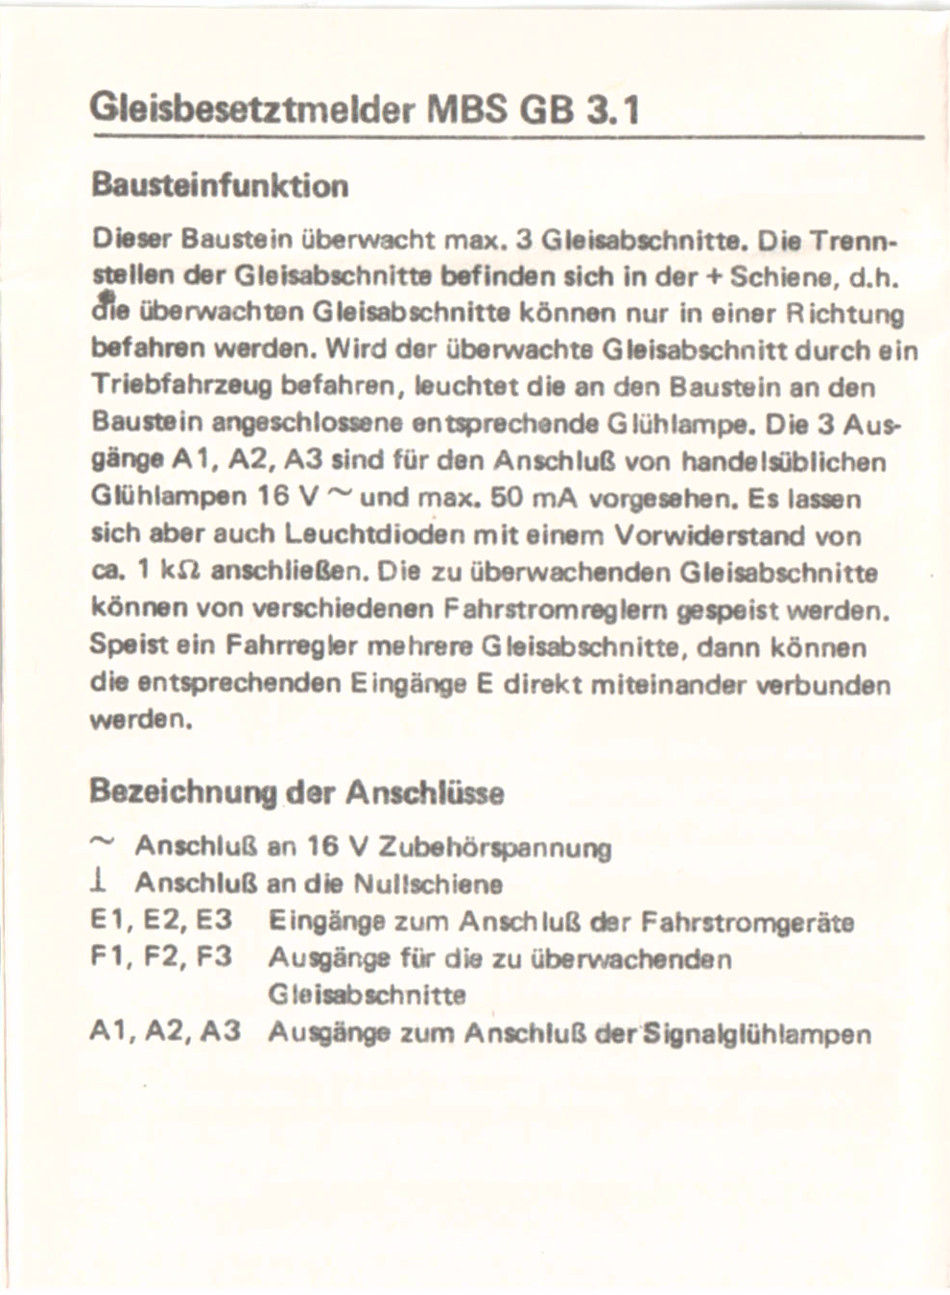 Bild 8 von 10 - MBS Gleisbesetztmelder GB 3.1 incl. Beschreibung
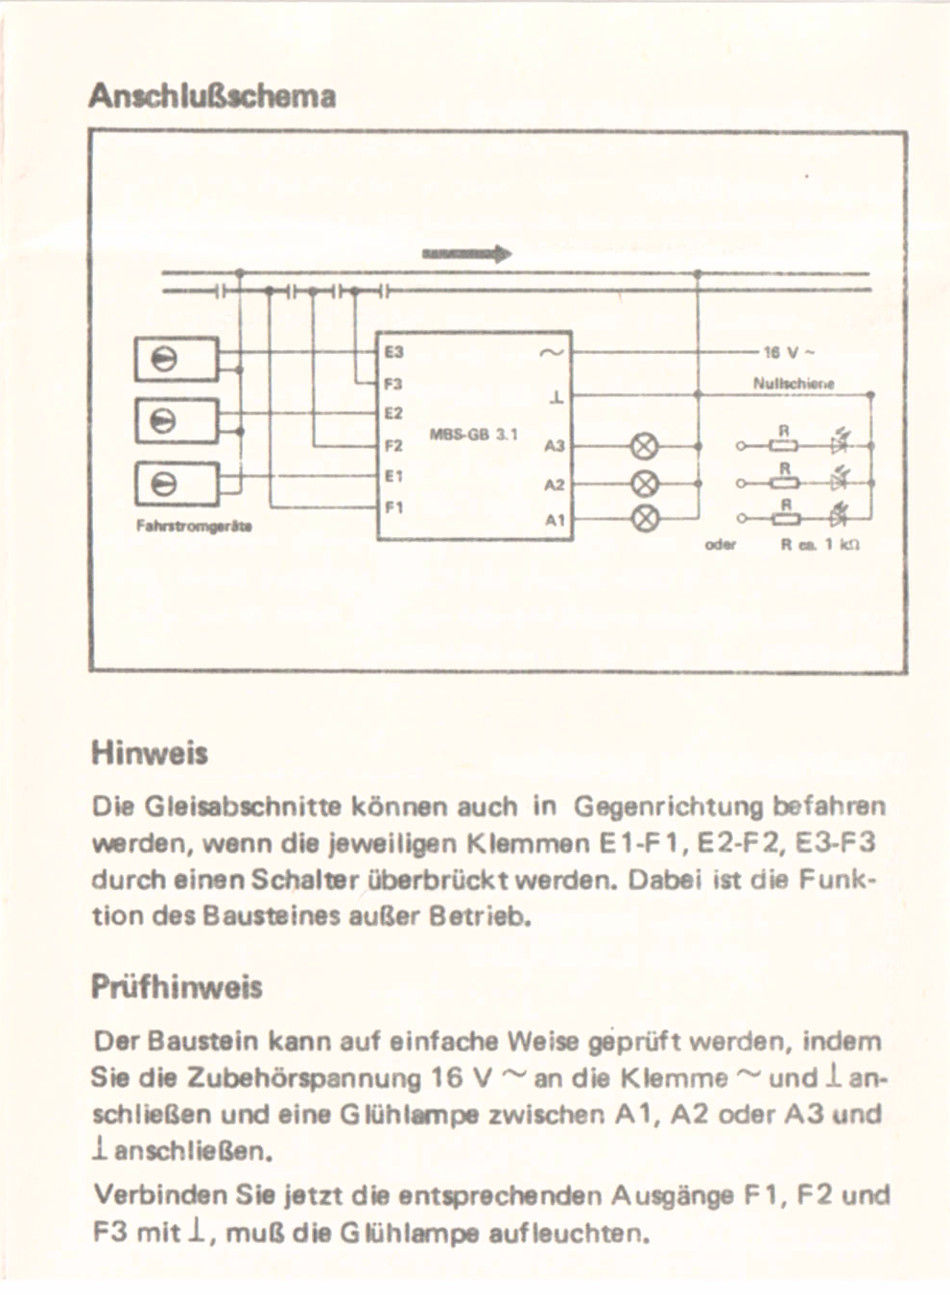 Bild 9 von 10 - MBS Gleisbesetztmelder GB 3.1 incl. Beschreibung
 Bild 10 von 10 - MBS Gleisbesetztmelder GB 3.1 incl. Beschreibung
MBS GB 3.1 Gleisbesetztmelder
incl. Bedienungsanleitung und Anschlussplan
10 Bilder zu:
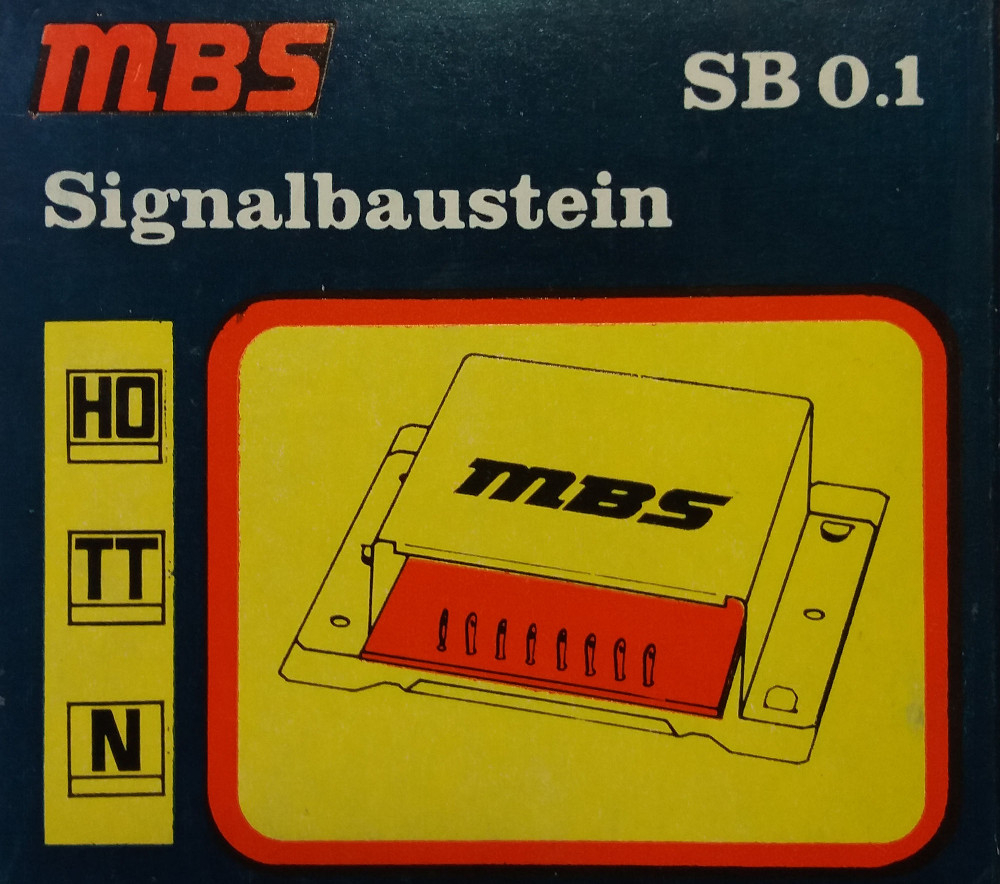
Bild 1 von 10 - MBS Signalbaustein SB 0.1 incl. Beschreibung
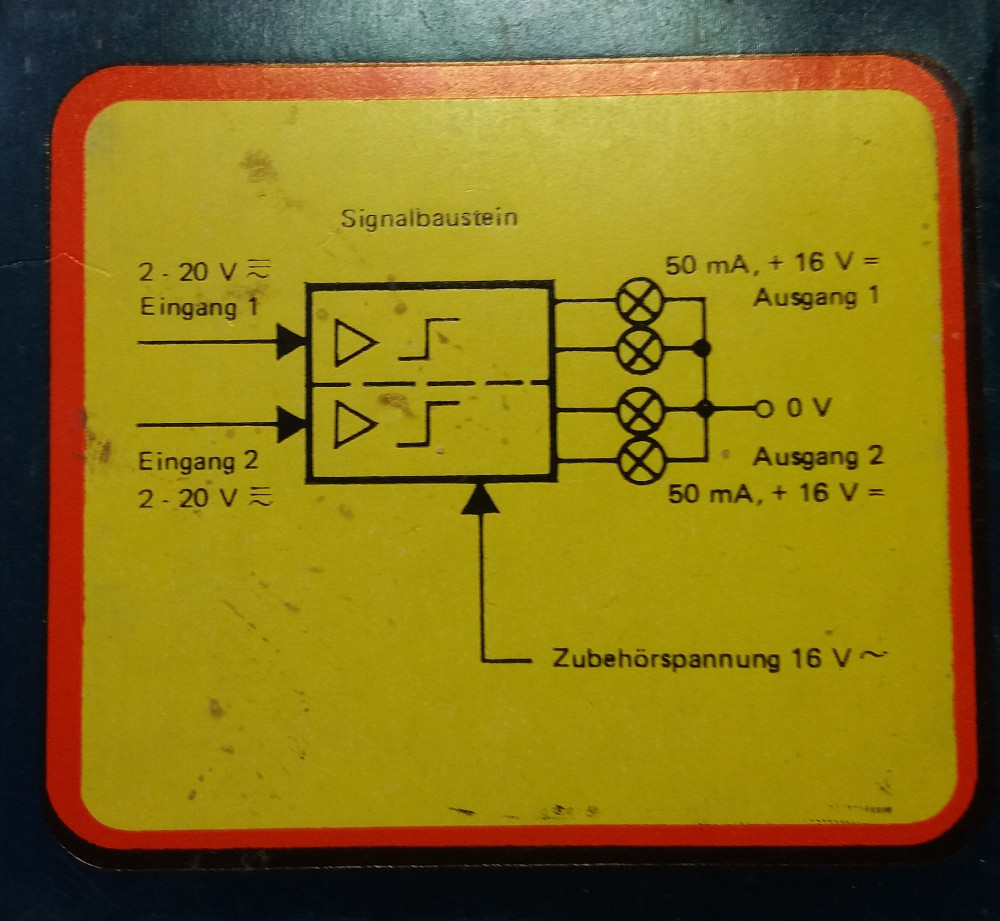 Bild 2 von 10 - MBS Signalbaustein SB 0.1 incl. Beschreibung
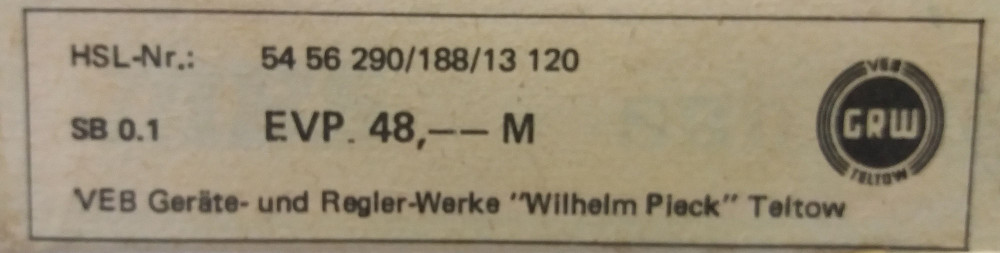 Bild 3 von 10 - MBS Signalbaustein SB 0.1 incl. Beschreibung
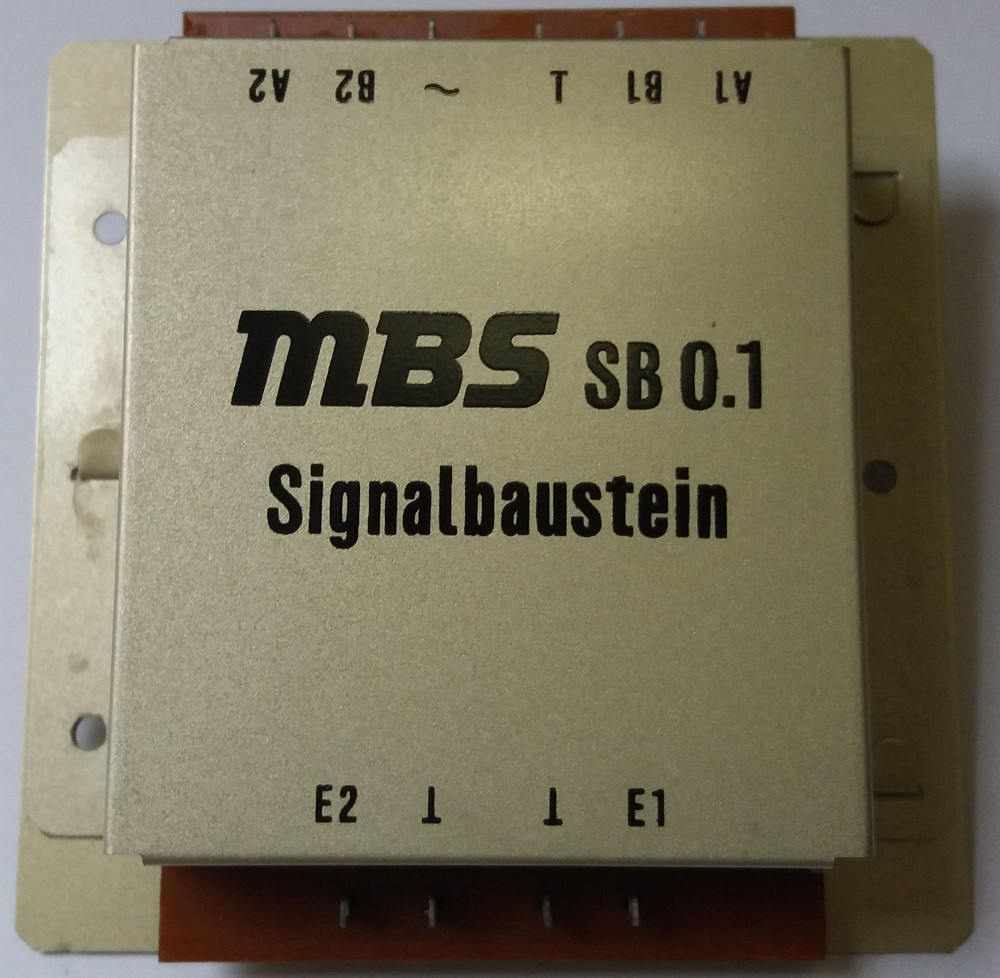 Bild 4 von 10 - MBS Signalbaustein SB 0.1 incl. Beschreibung
 Bild 5 von 10 - MBS Signalbaustein SB 0.1 incl. Beschreibung
 Bild 6 von 10 - MBS Signalbaustein SB 0.1 incl. Beschreibung
 Bild 7 von 10 - MBS Signalbaustein SB 0.1 incl. Beschreibung
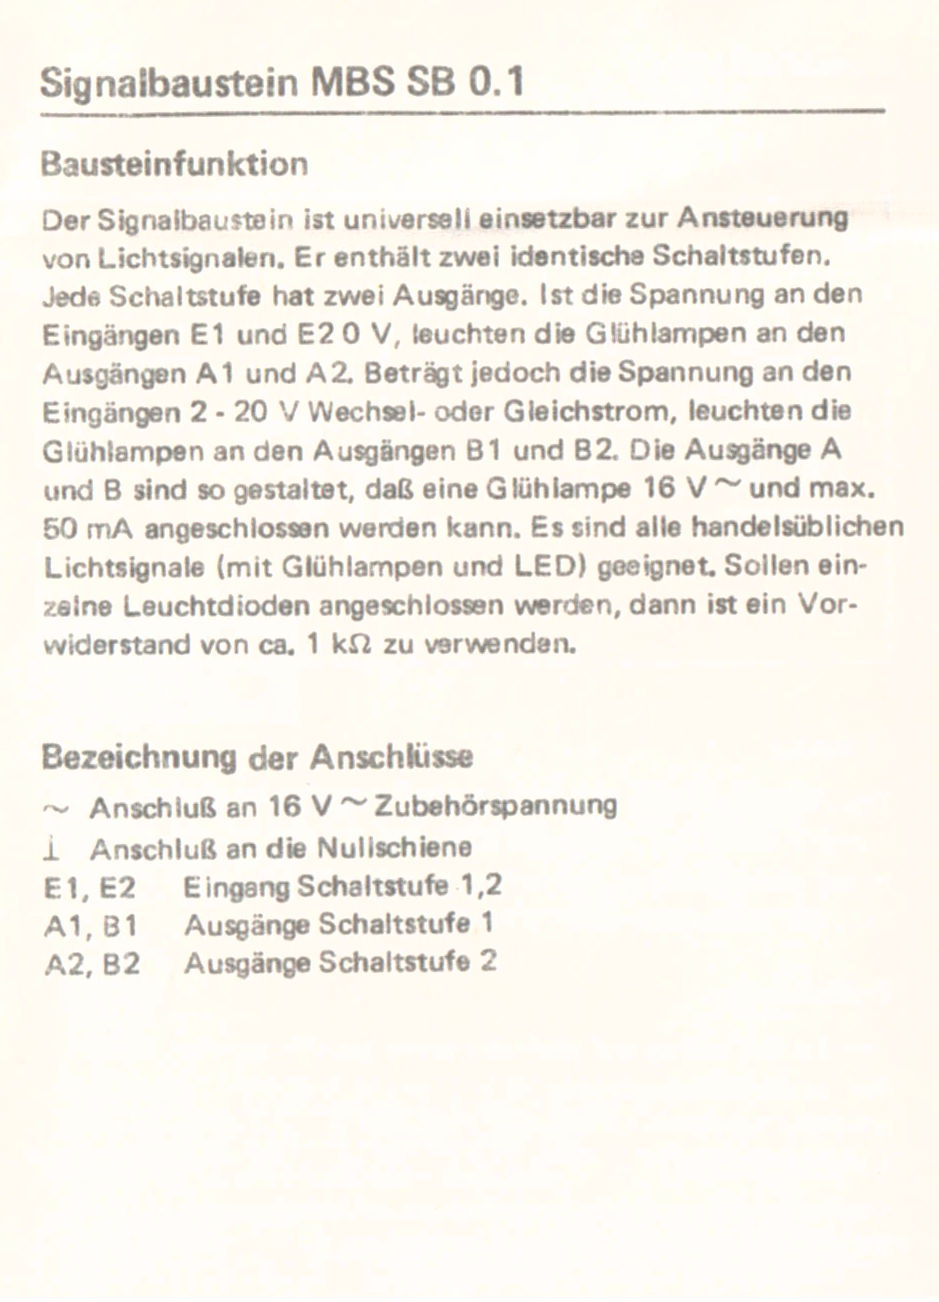 Bild 8 von 10 - MBS Signalbaustein SB 0.1 incl. Beschreibung
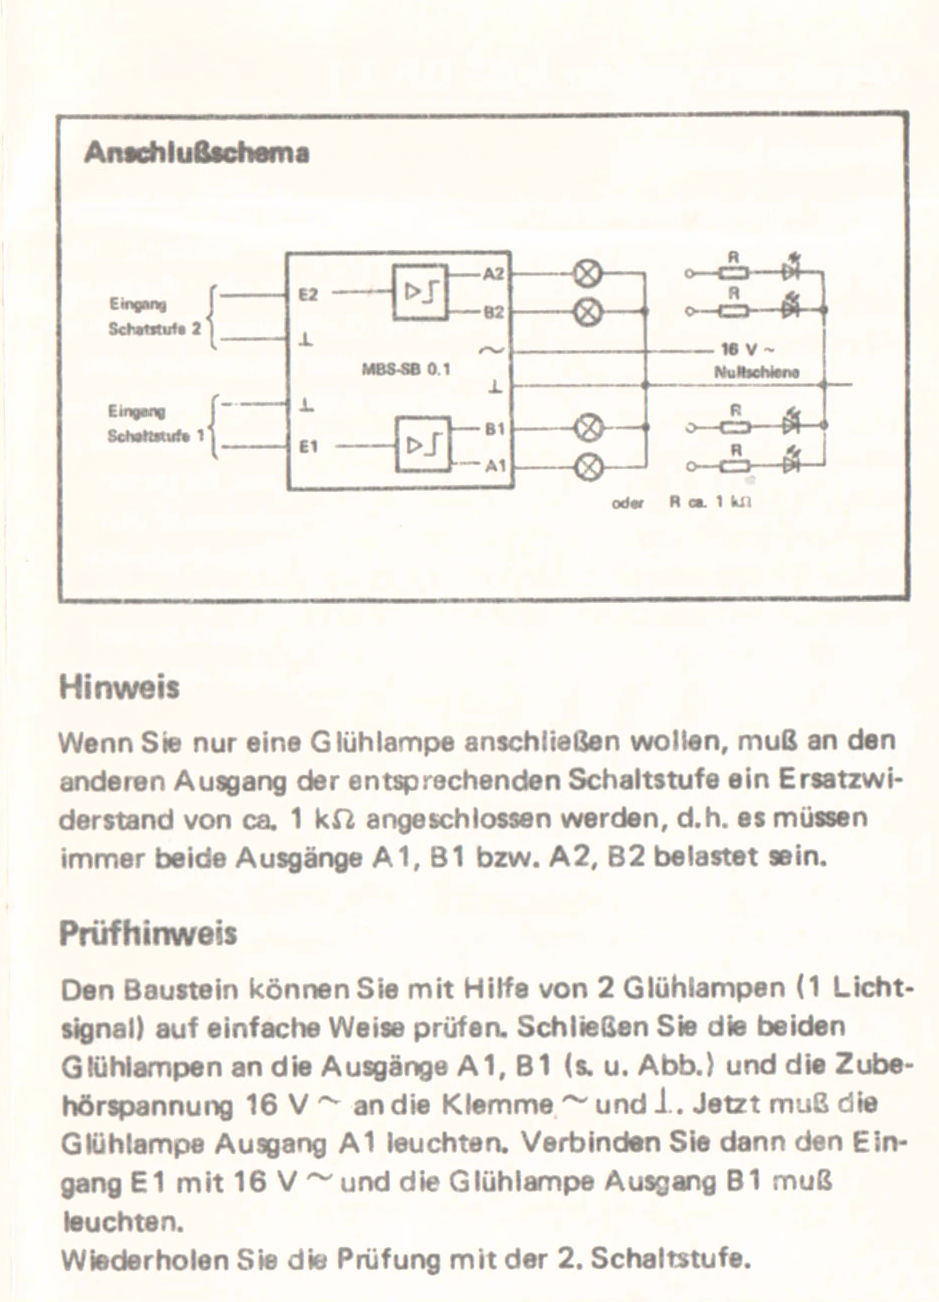 Bild 9 von 10 - MBS Signalbaustein SB 0.1 incl. Beschreibung
 Bild 10 von 10 - MBS Signalbaustein SB 0.1 incl. Beschreibung
MBS SB 0.1 Signalbaustein
incl. Bedienungsanleitung und Anschlussplan
12 Bilder zu:
Bild 1 von 12 - MBS Block-, Anfahr- und Bremsbaustein mit Päzisionsstopp incl. Beschreibung
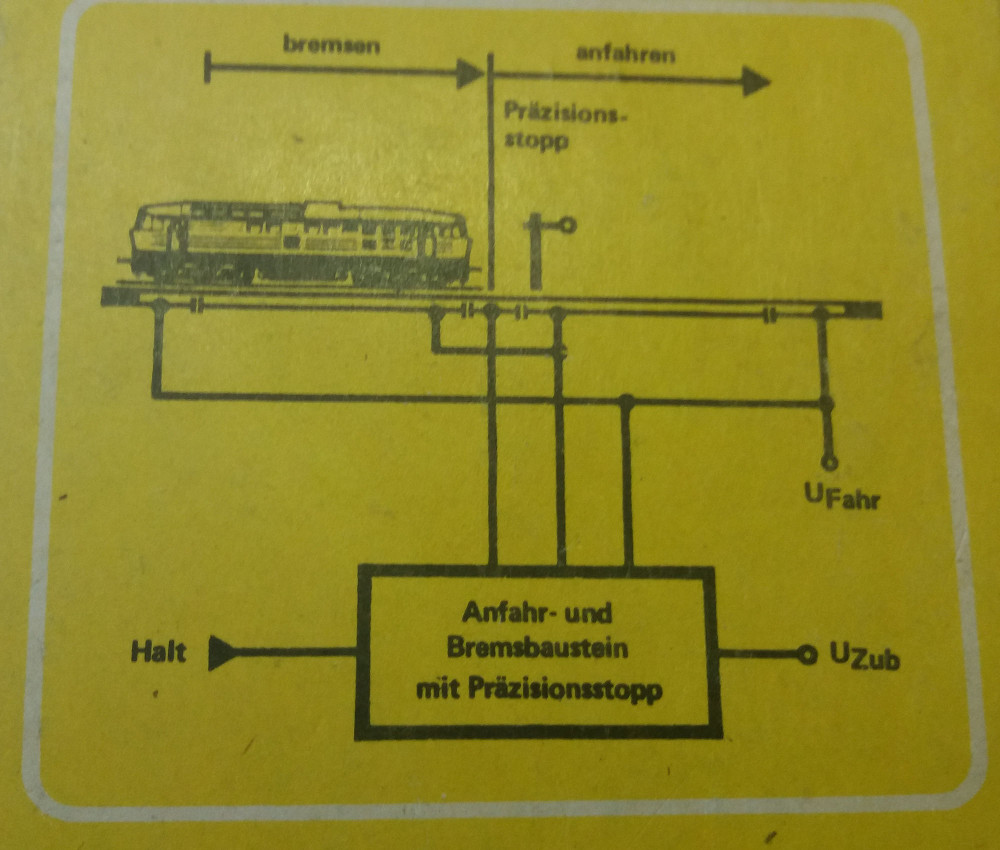 Bild 2 von 12 - MBS Block-, Anfahr- und Bremsbaustein mit Päzisionsstopp incl. Beschreibung
 Bild 3 von 12 - MBS Block-, Anfahr- und Bremsbaustein mit Päzisionsstopp incl. Beschreibung
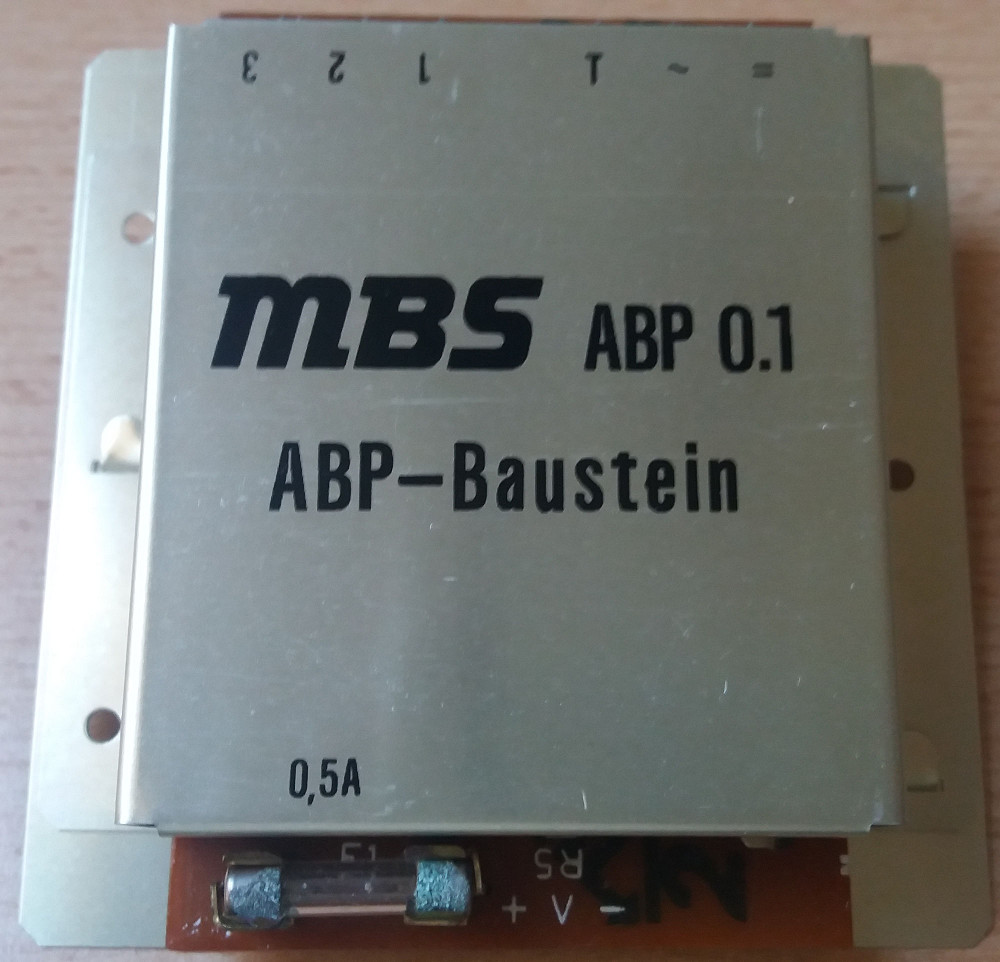 Bild 4 von 12 - MBS Block-, Anfahr- und Bremsbaustein mit Päzisionsstopp incl. Beschreibung
 Bild 5 von 12 - MBS Block-, Anfahr- und Bremsbaustein mit Päzisionsstopp incl. Beschreibung
 Bild 6 von 12 - MBS Block-, Anfahr- und Bremsbaustein mit Päzisionsstopp incl. Beschreibung
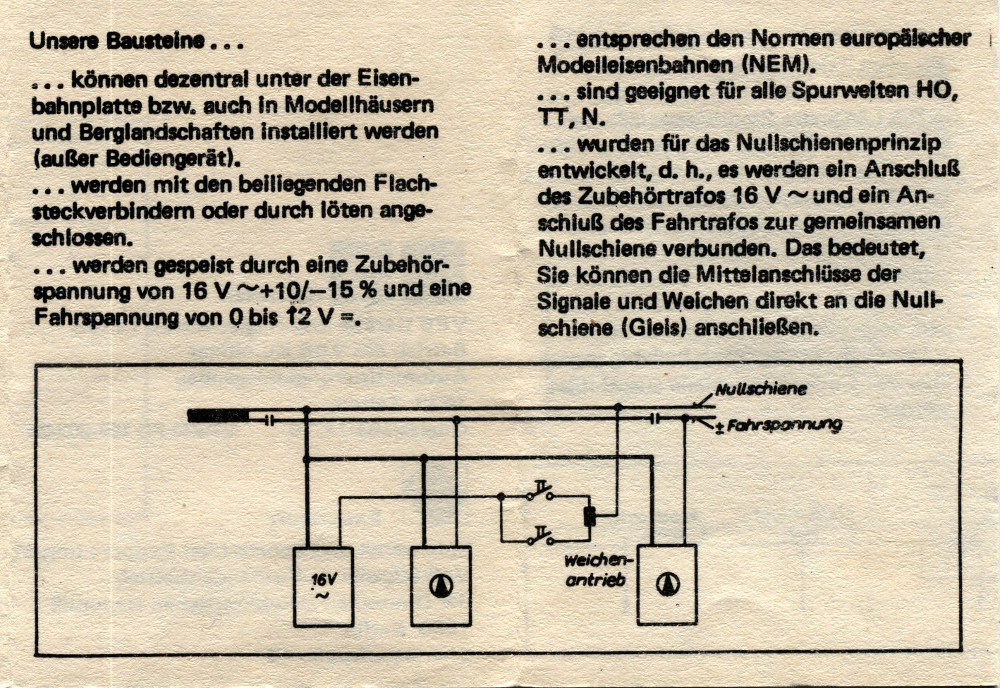 Bild 7 von 12 - MBS Block-, Anfahr- und Bremsbaustein mit Päzisionsstopp incl. Beschreibung
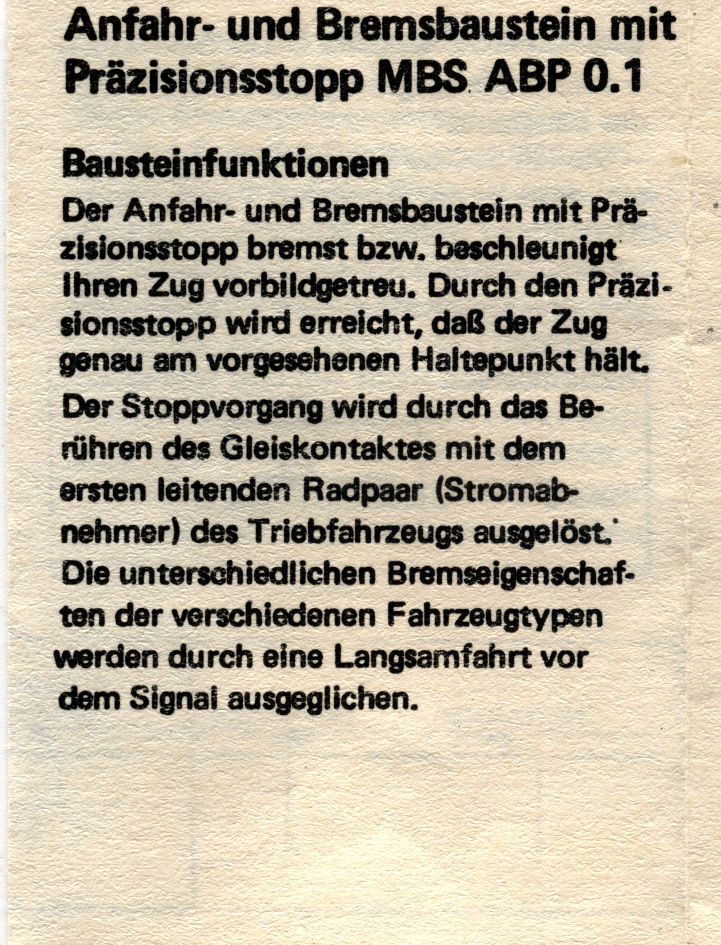 Bild 8 von 12 - MBS Block-, Anfahr- und Bremsbaustein mit Päzisionsstopp incl. Beschreibung
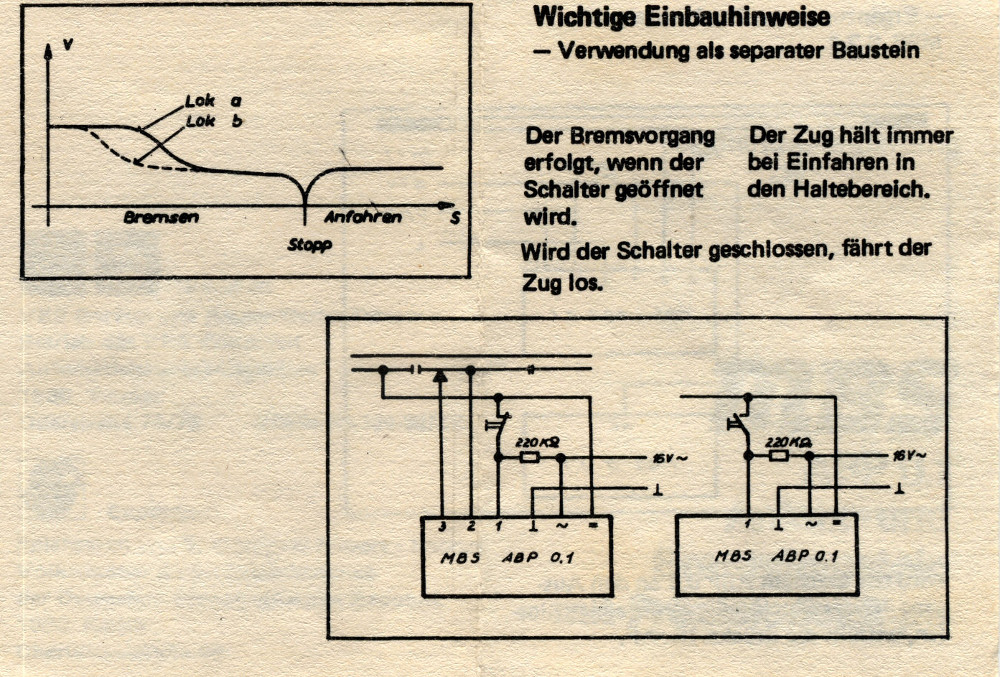 Bild 9 von 12 - MBS Block-, Anfahr- und Bremsbaustein mit Päzisionsstopp incl. Beschreibung
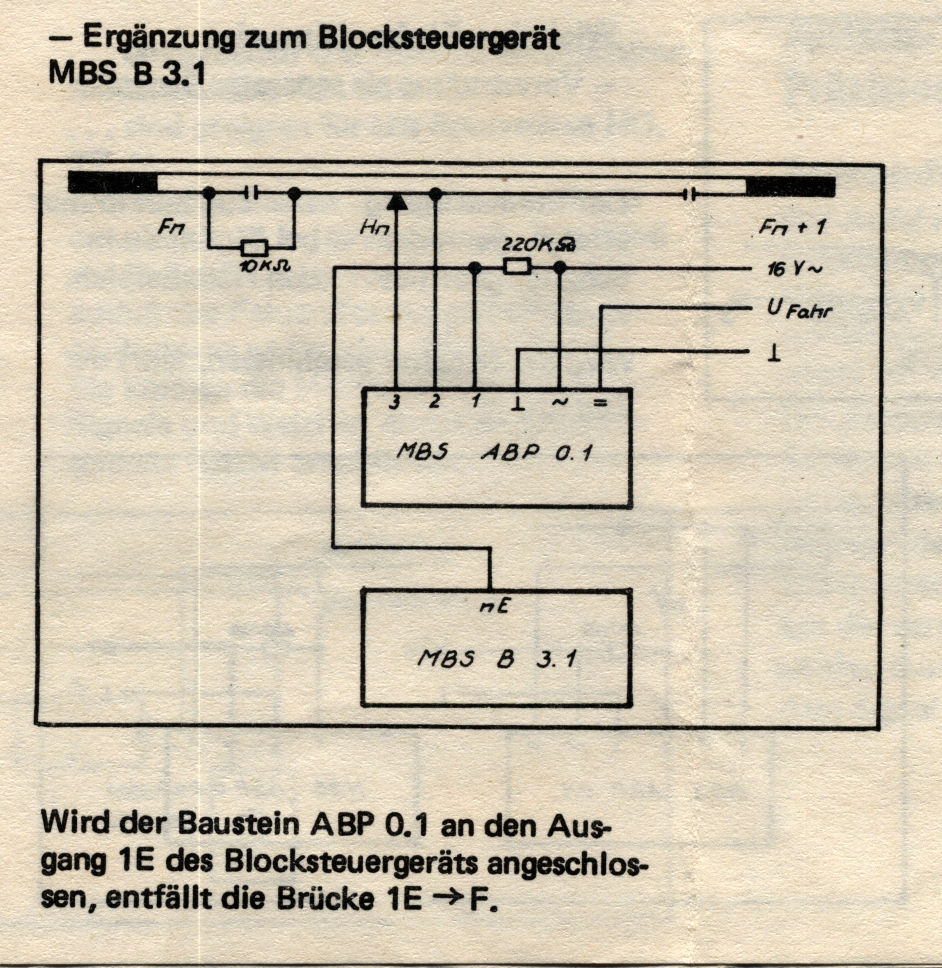 Bild 10 von 12 - MBS Block-, Anfahr- und Bremsbaustein mit Päzisionsstopp incl. Beschreibung
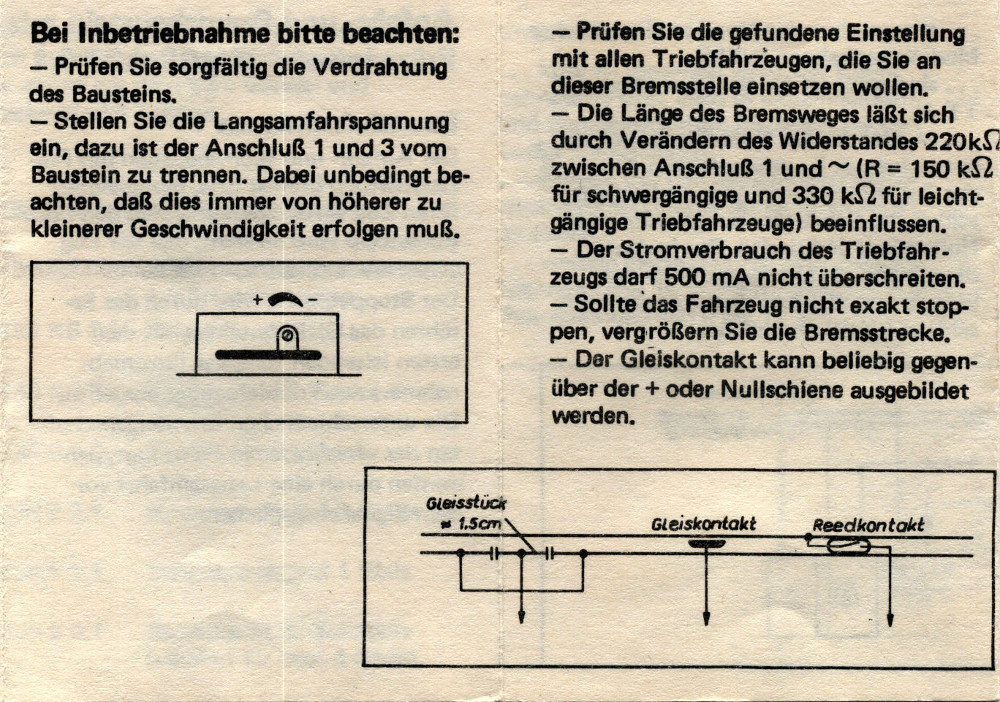 Bild 11 von 12 - MBS Block-, Anfahr- und Bremsbaustein mit Päzisionsstopp incl. Beschreibung
 Bild 12 von 12 - MBS Block-, Anfahr- und Bremsbaustein mit Päzisionsstopp incl. Beschreibung
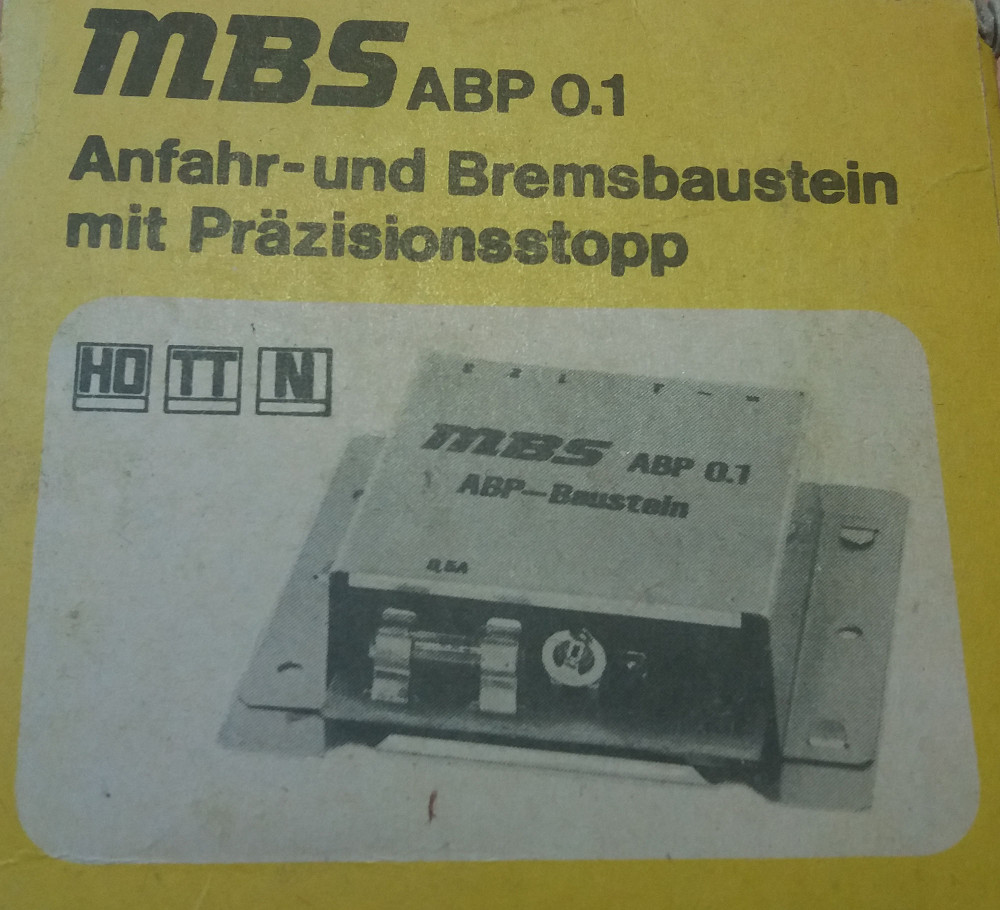
MBS ABP 0.1 Block-,Anfahr- und
Bremsbaustein mit Päzisionsstopp
incl. Bedienungsanleitung und Anschlussplan
14 Bilder zu:
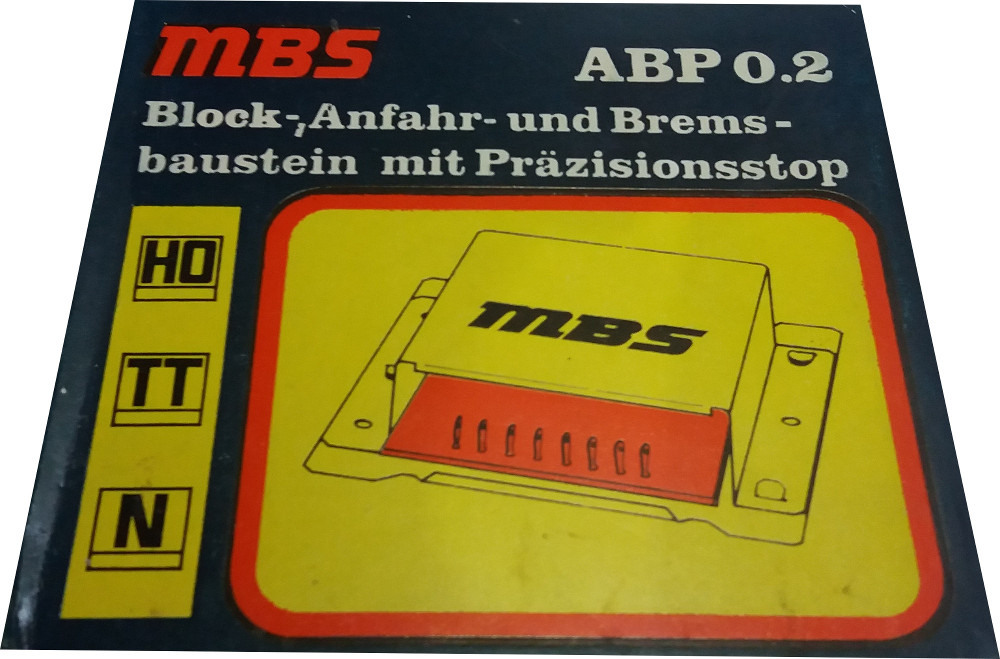
Bild 1 von 14 - MBS Block-, Anfahr- und Bremsbaustein mit Päzisionsstopp incl. Beschreibung
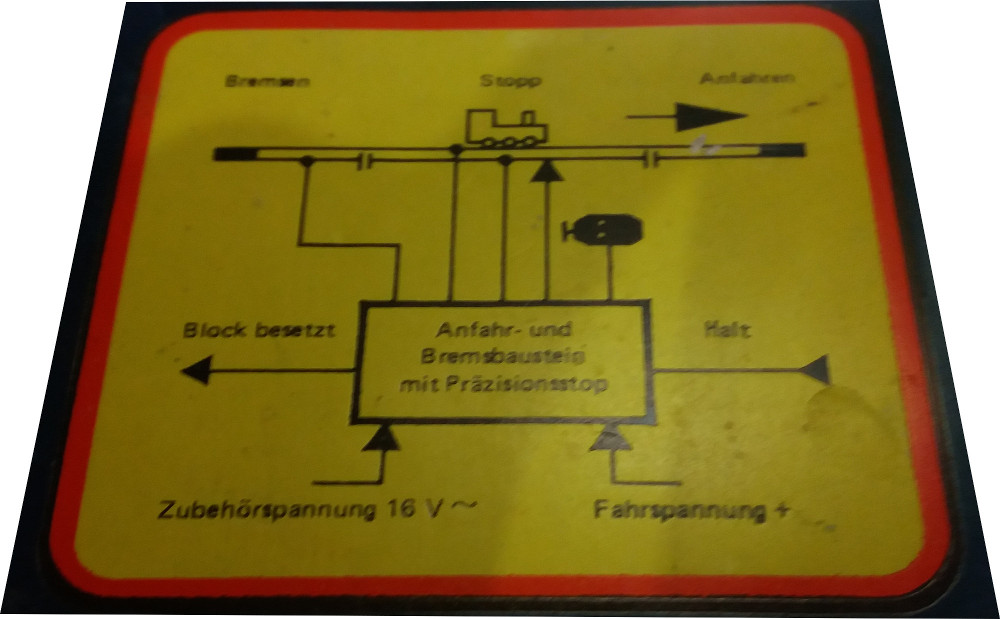 Bild 2 von 14 - MBS Block-, Anfahr- und Bremsbaustein mit Päzisionsstopp incl. Beschreibung
 Bild 3 von 14 - MBS Block-, Anfahr- und Bremsbaustein mit Päzisionsstopp incl. Beschreibung
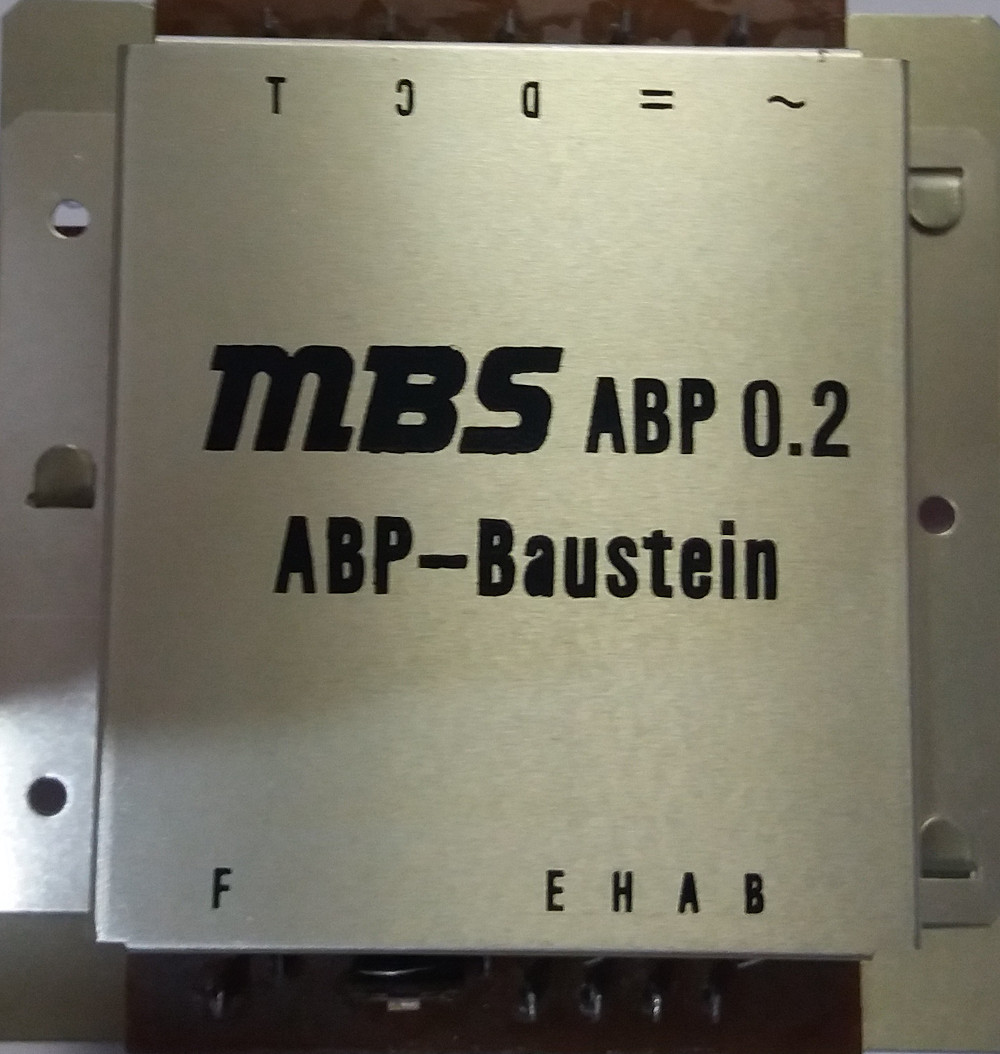 Bild 4 von 14 - MBS Block-, Anfahr- und Bremsbaustein mit Päzisionsstopp incl. Beschreibung
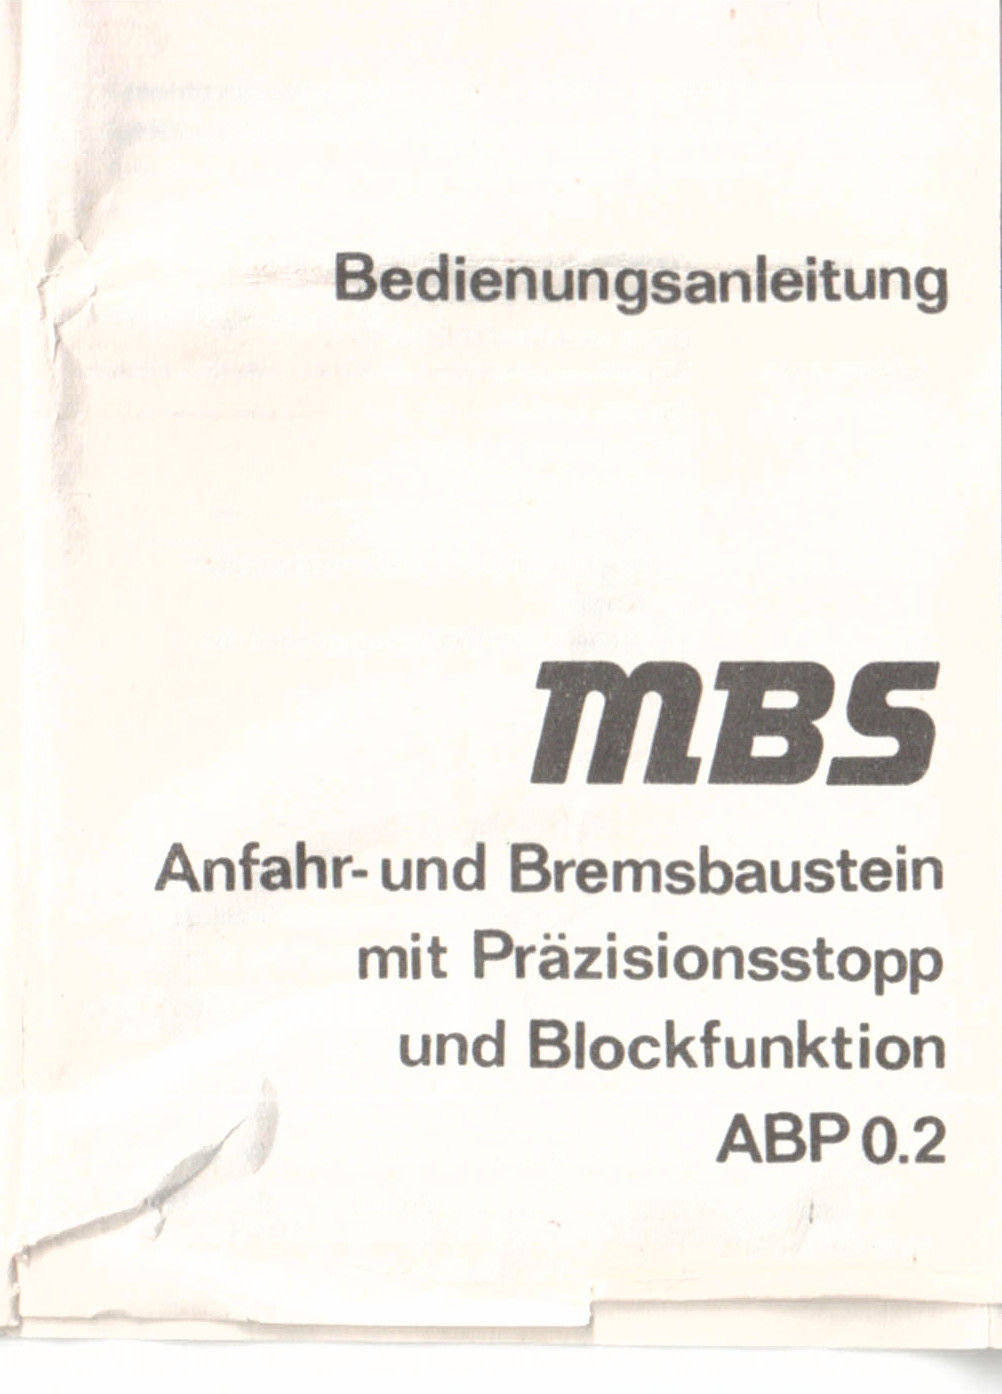 Bild 5 von 14 - MBS Block-, Anfahr- und Bremsbaustein mit Päzisionsstopp incl. Beschreibung
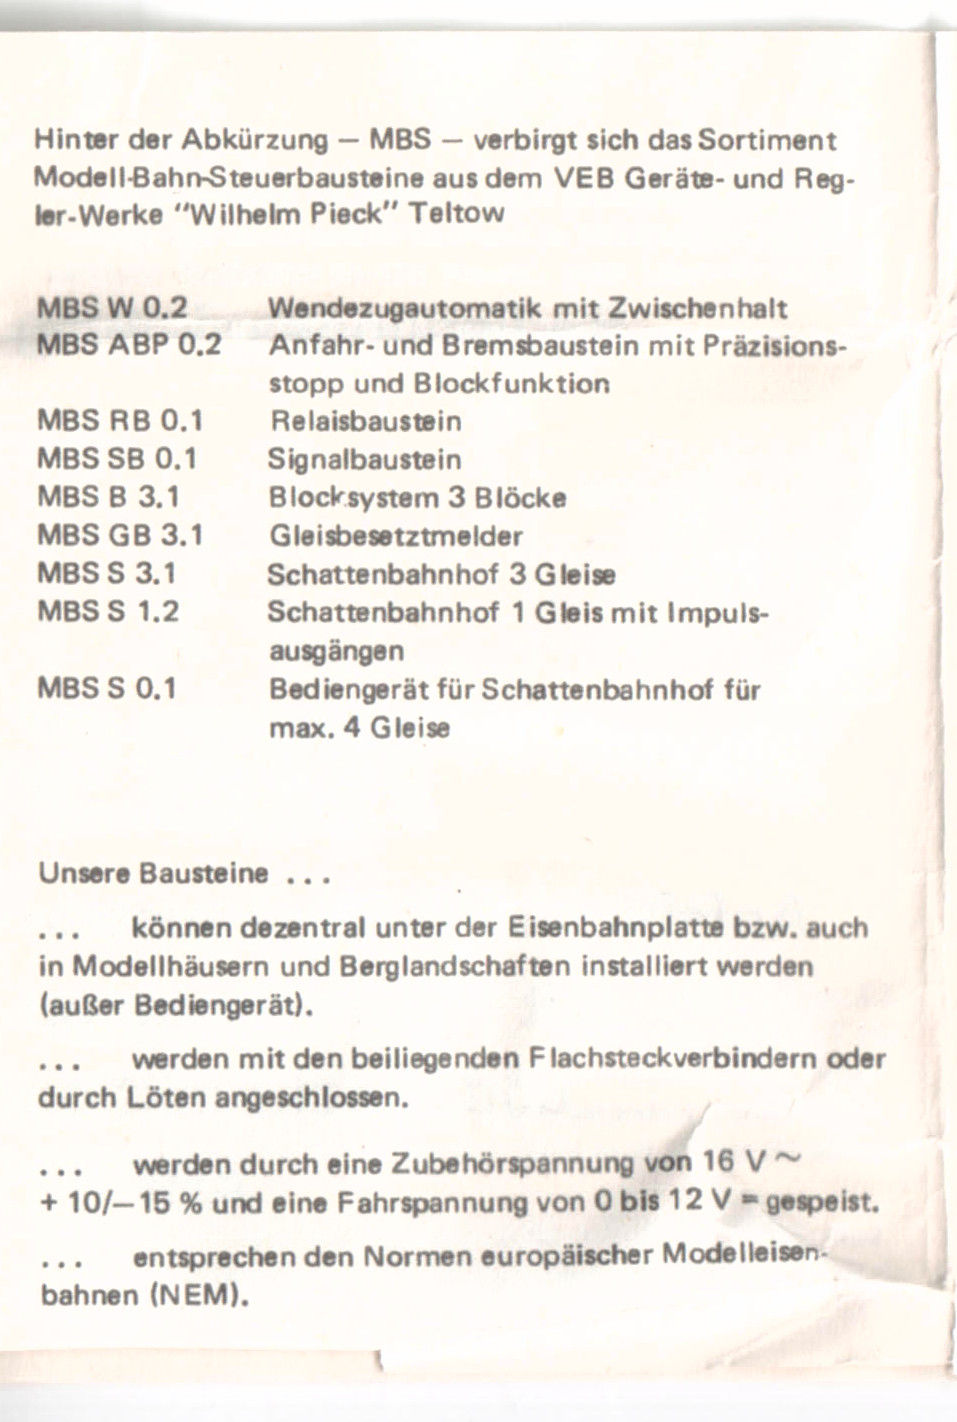 Bild 6 von 14 - MBS Block-, Anfahr- und Bremsbaustein mit Päzisionsstopp incl. Beschreibung
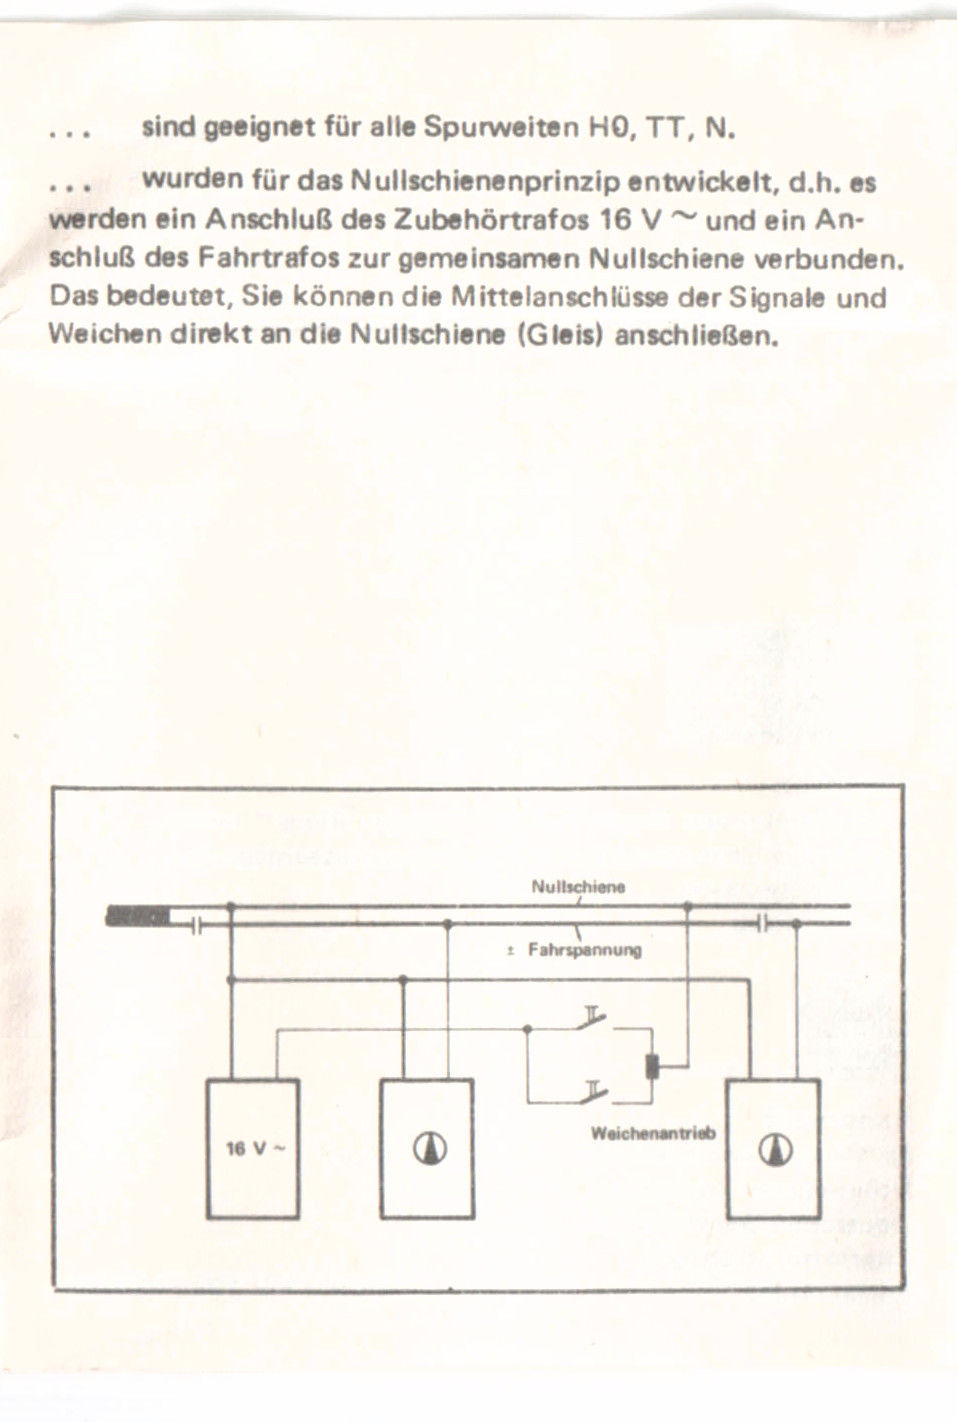 Bild 7 von 14 - MBS Block-, Anfahr- und Bremsbaustein mit Päzisionsstopp incl. Beschreibung
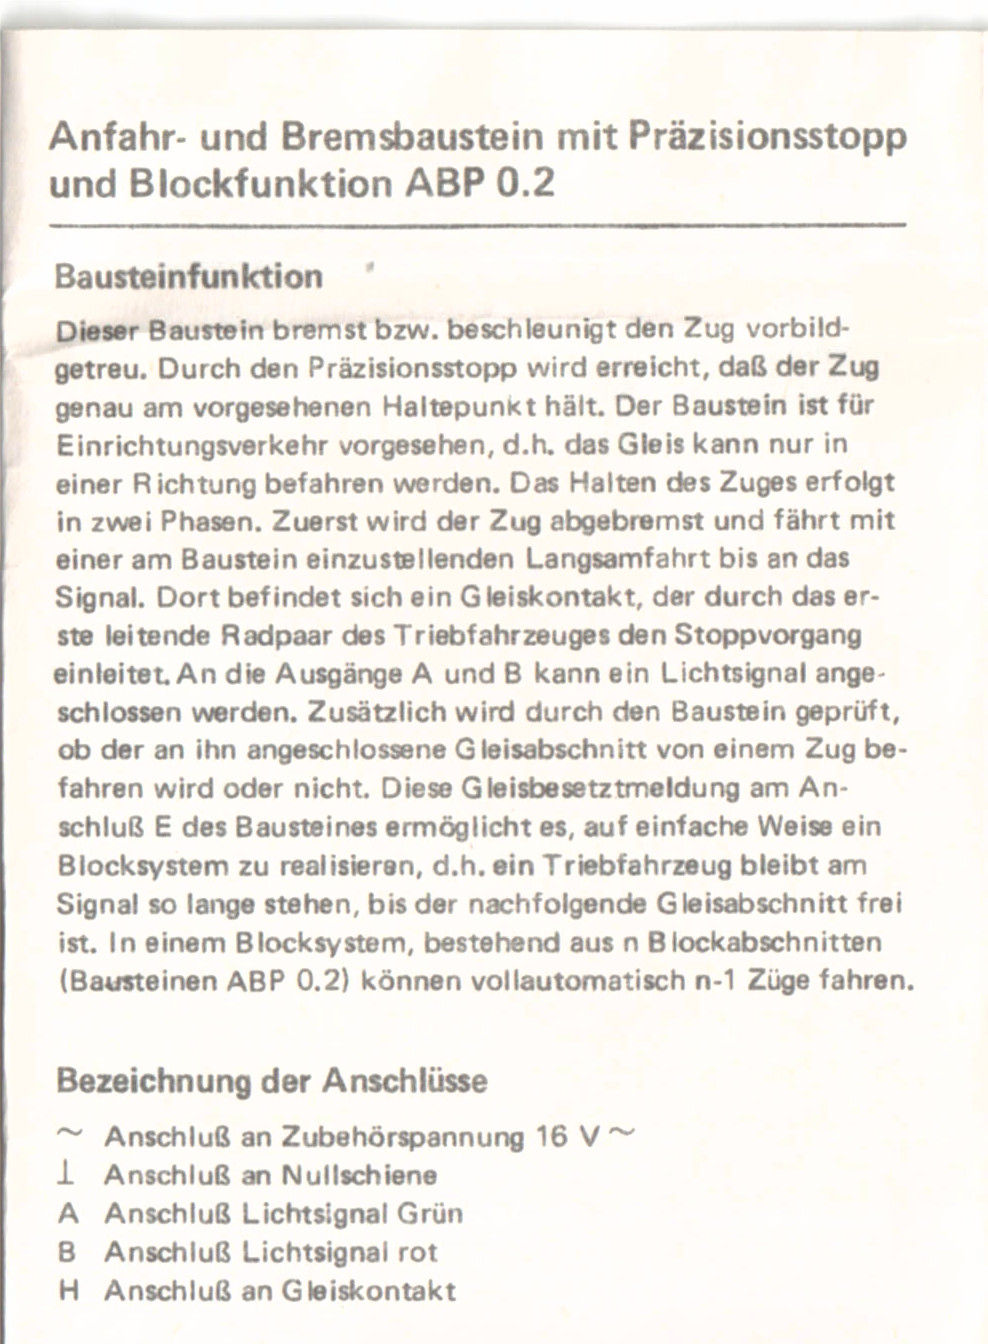 Bild 8 von 14 - MBS Block-, Anfahr- und Bremsbaustein mit Päzisionsstopp incl. Beschreibung
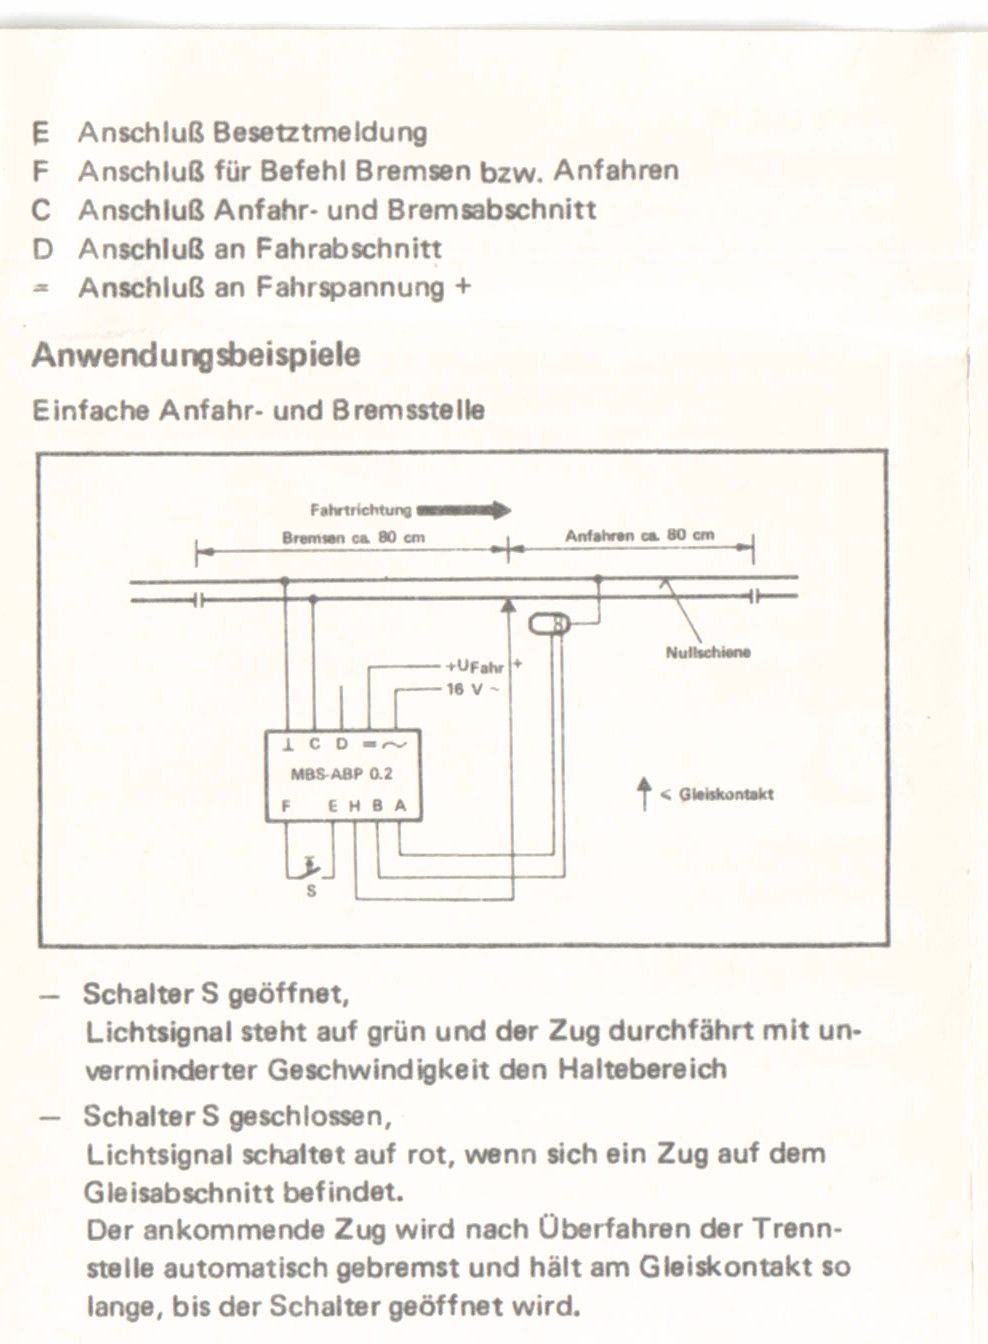 Bild 9 von 14 - MBS Block-, Anfahr- und Bremsbaustein mit Päzisionsstopp incl. Beschreibung
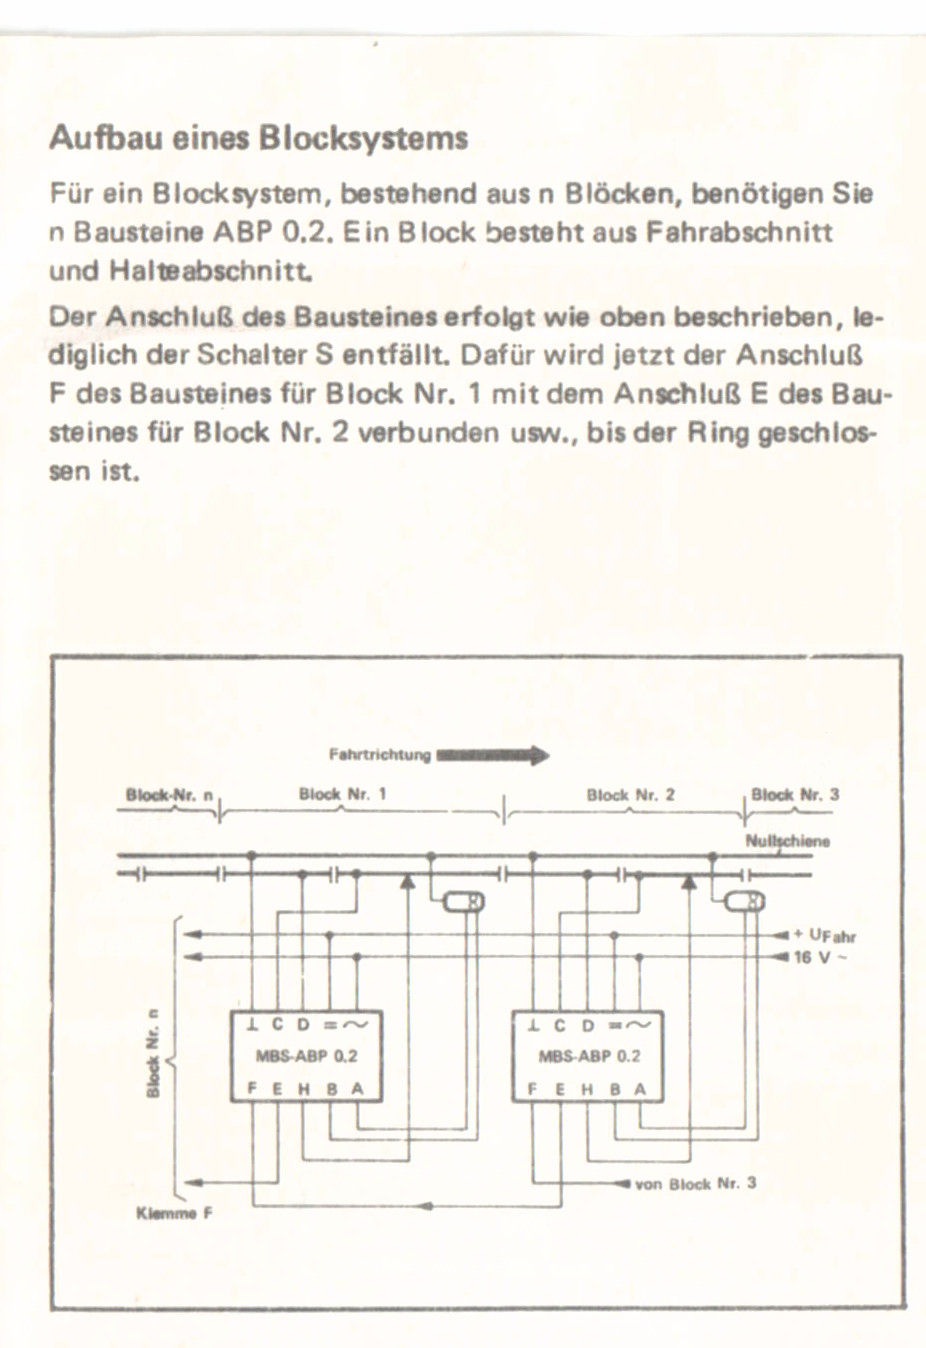 Bild 10 von 14 - MBS Block-, Anfahr- und Bremsbaustein mit Päzisionsstopp incl. Beschreibung
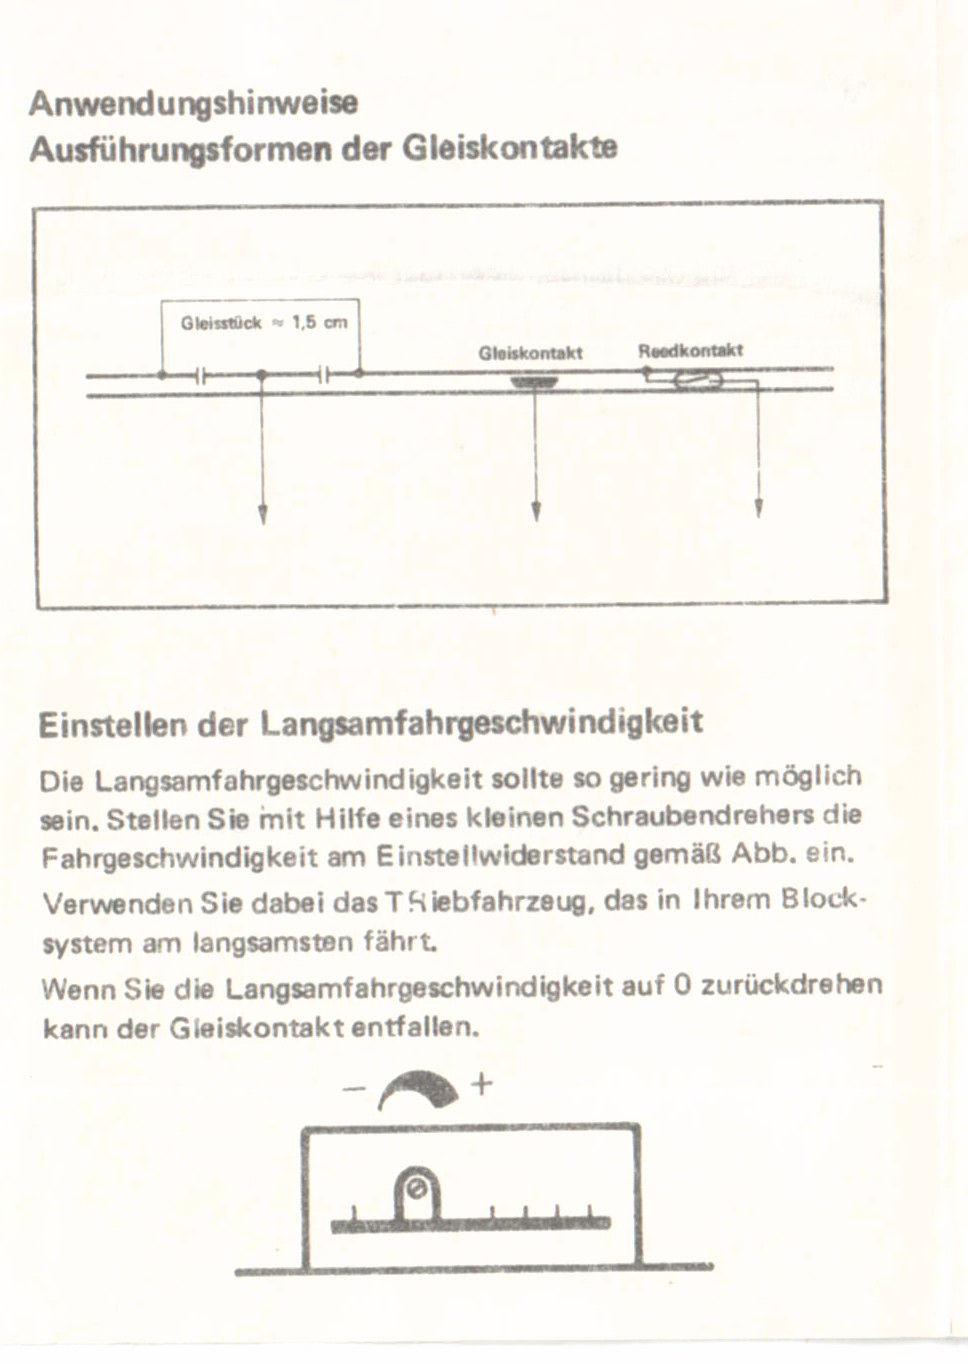 Bild 11 von 14 - MBS Block-, Anfahr- und Bremsbaustein mit Päzisionsstopp incl. Beschreibung
 Bild 12 von 14 - MBS Block-, Anfahr- und Bremsbaustein mit Päzisionsstopp incl. Beschreibung
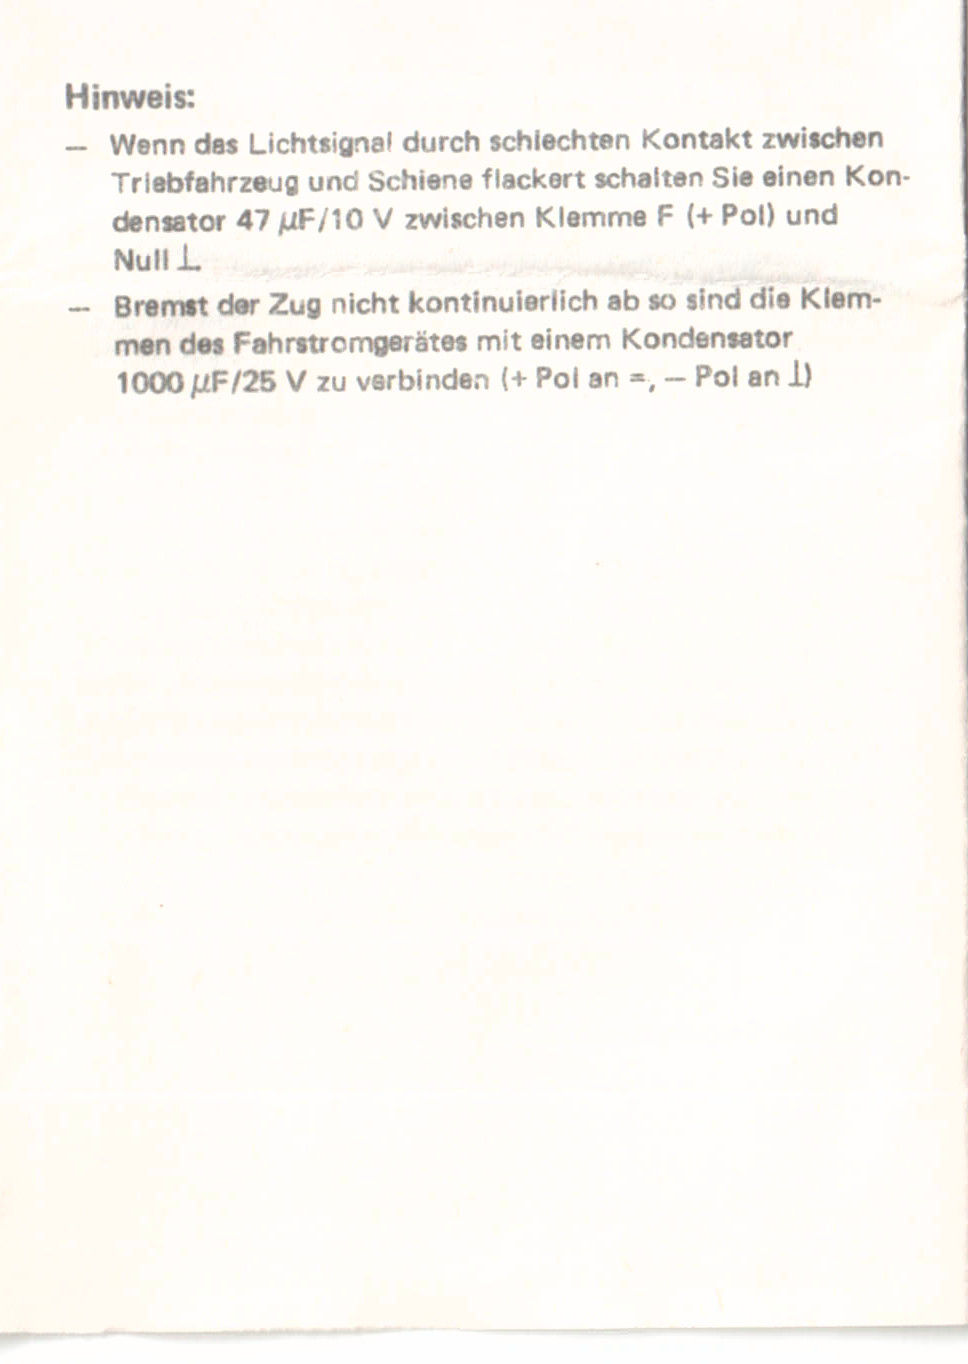 Bild 13 von 14 - MBS Block-, Anfahr- und Bremsbaustein mit Päzisionsstopp incl. Beschreibung
 Bild 14 von 14 - MBS Block-, Anfahr- und Bremsbaustein mit Päzisionsstopp incl. Beschreibung
MBS ABP 0.2 Block-,Anfahr- und
Bremsbaustein mit Päzisionsstopp
incl. Bedienungsanleitung und Anschlussplan
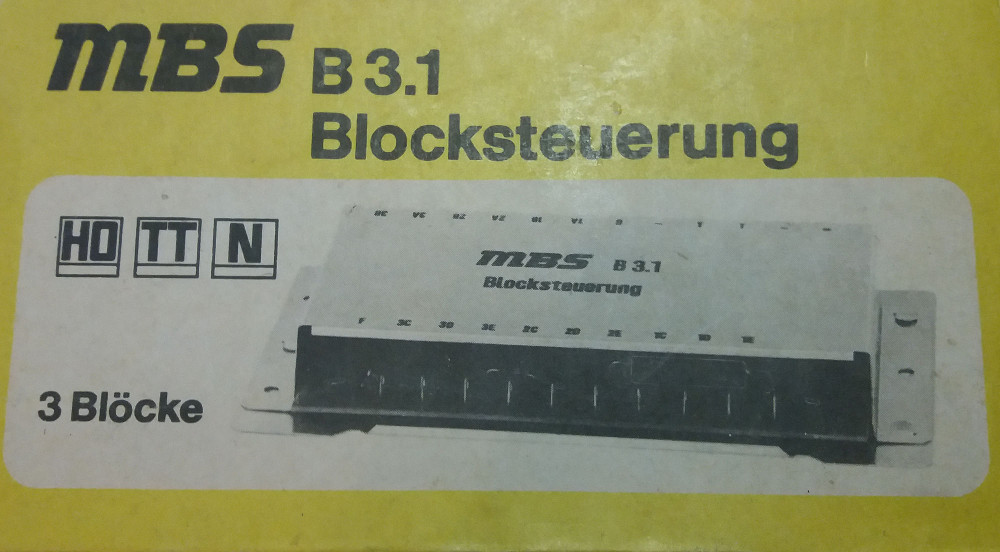
12 Bilder zu:
Bild 1 von 12 - MBS Blocksteuerung B3.1 incl. Beschreibung
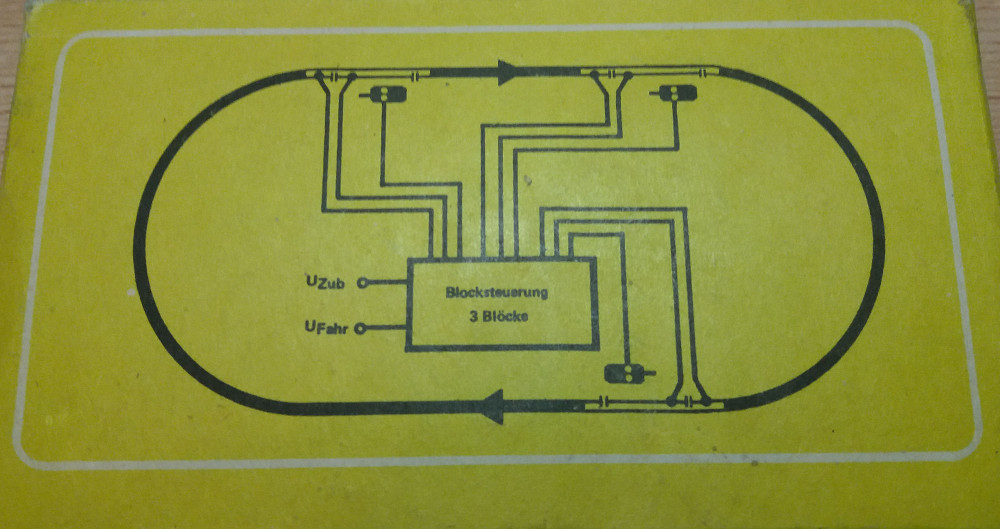 Bild 2 von 12 - MBS Blocksteuerung B3.1 incl. Beschreibung
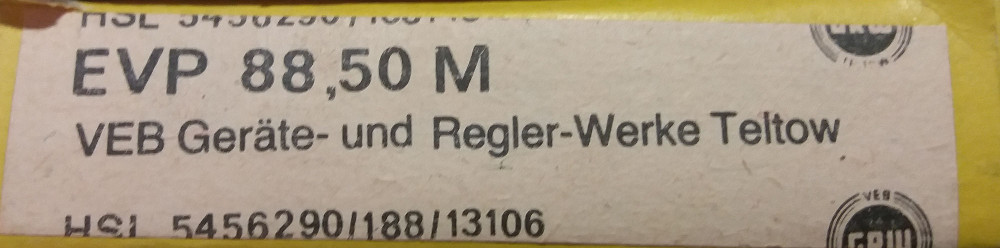 Bild 3 von 12 - MBS Blocksteuerung B3.1 incl. Beschreibung
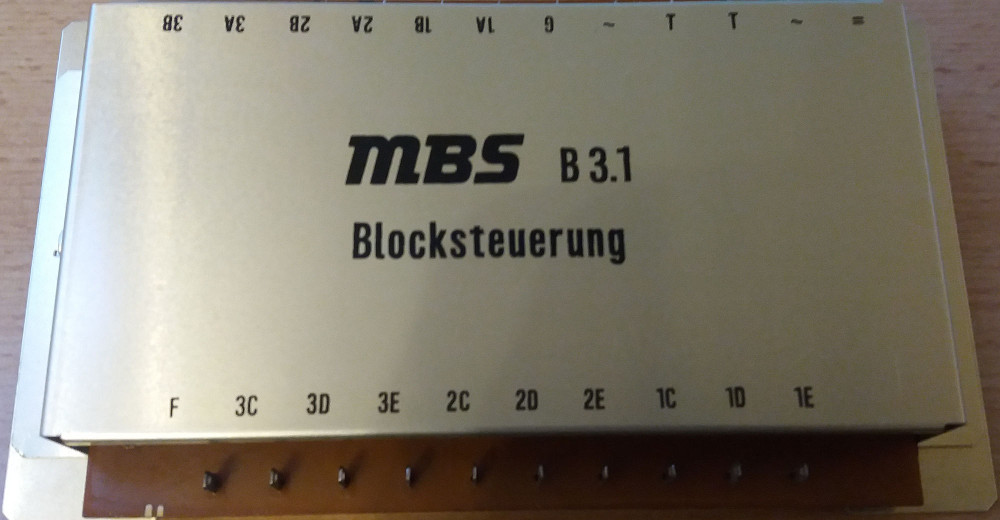 Bild 4 von 12 - MBS Blocksteuerung B3.1 incl. Beschreibung
 Bild 5 von 12 - MBS Blocksteuerung B3.1 incl. Beschreibung
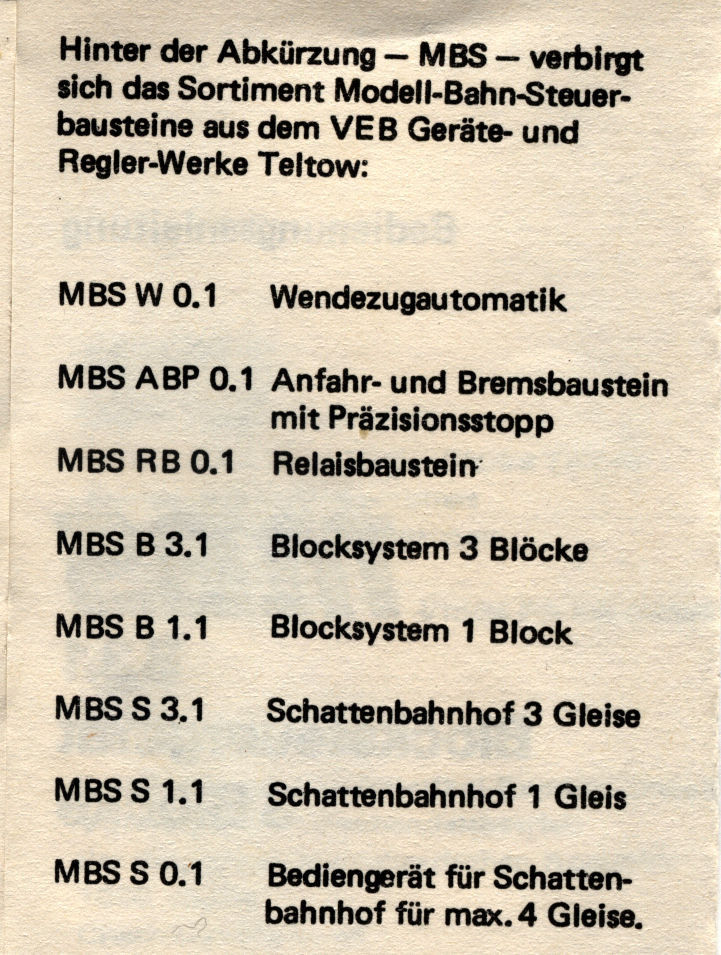 Bild 6 von 12 - MBS Blocksteuerung B3.1 incl. Beschreibung
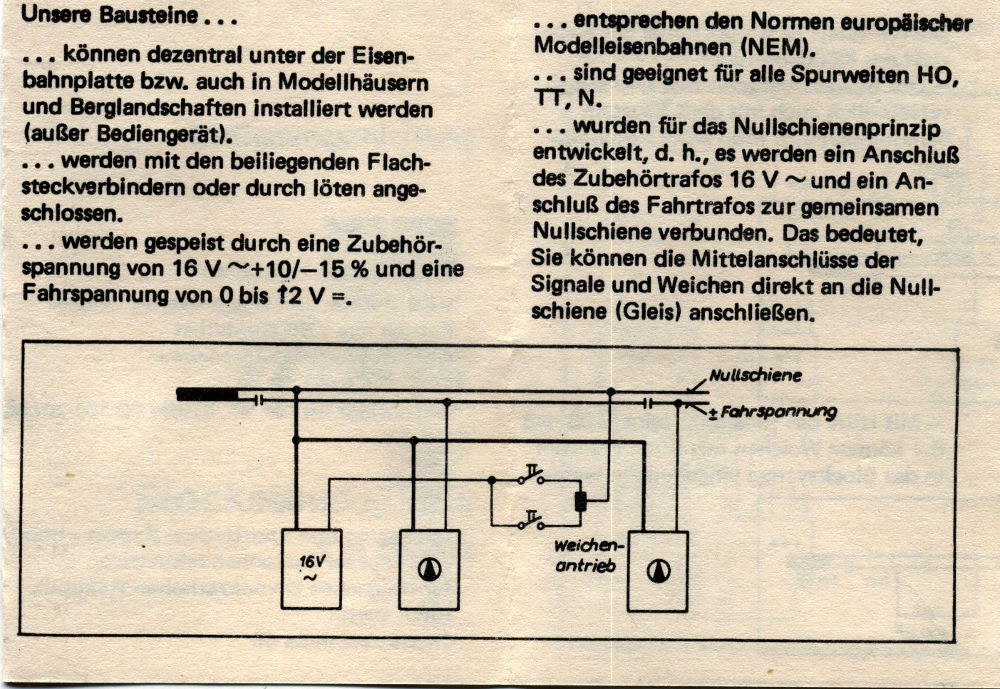 Bild 7 von 12 - MBS Blocksteuerung B3.1 incl. Beschreibung
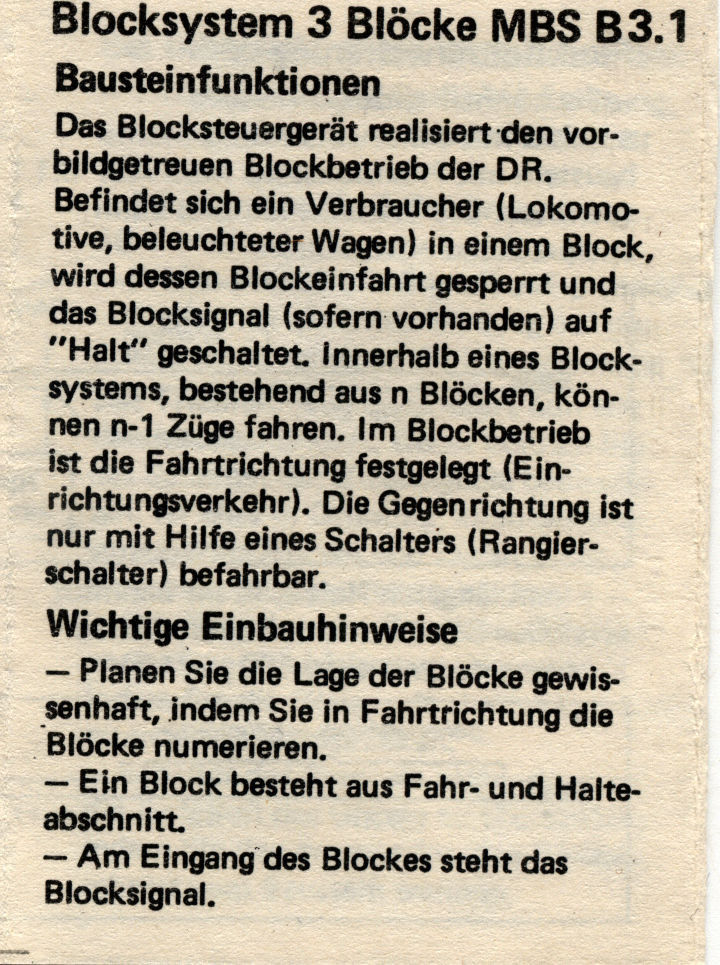 Bild 8 von 12 - MBS Blocksteuerung B3.1 incl. Beschreibung
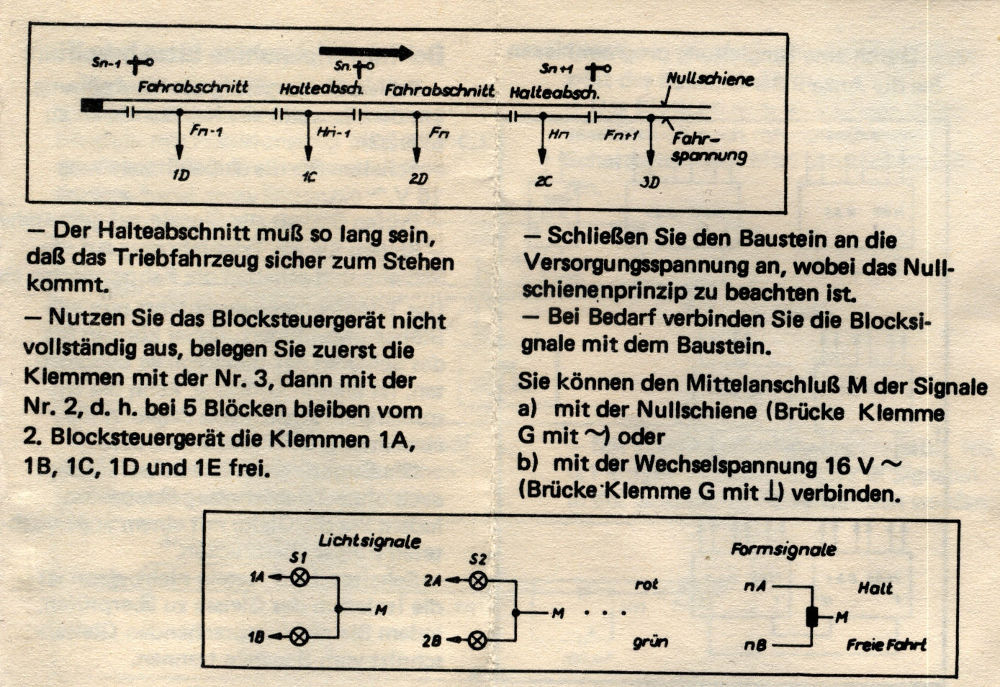 Bild 9 von 12 - MBS Blocksteuerung B3.1 incl. Beschreibung
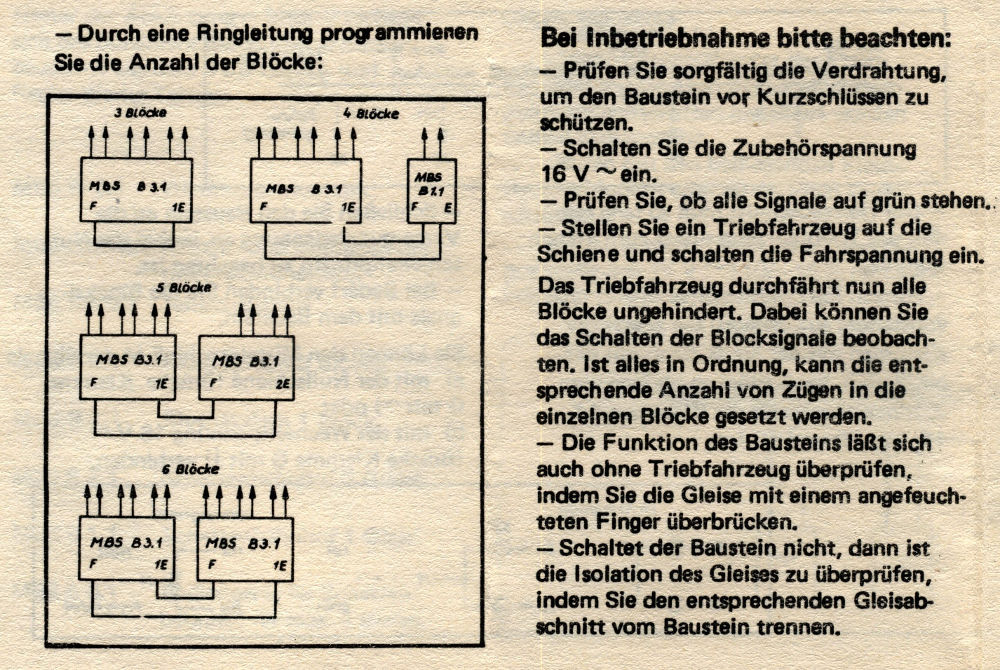 Bild 10 von 12 - MBS Blocksteuerung B3.1 incl. Beschreibung
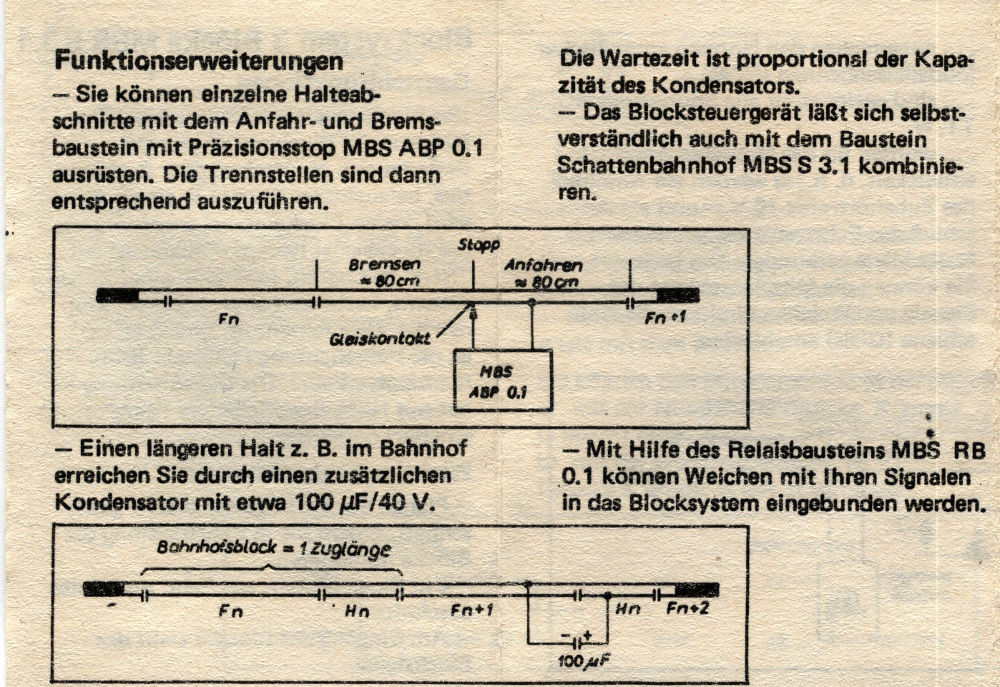 Bild 11 von 12 - MBS Blocksteuerung B3.1 incl. Beschreibung
 Bild 12 von 12 - MBS Blocksteuerung B3.1 incl. Beschreibung
MBS Blocksteuerung B3.1 3 Blöcke
incl. Bedienungsanleitung und Anschlussplan